How to Paint Realistic Mud in Photoshop

Introduction Paint mud in Photoshop can enhance the authenticity of your digital landscapes and artworks. This tutorial will guide you through the process using our custom mud brushes, ensuring that you achieve stunning results every time. Whether you’re a novice or a seasoned artist, our step-by-step guide will make the process straightforward and enjoyable.

Tutorial Assets

Step 1: Select the color palettes

Select the color palettes To paint realistic mud with the brushes, you need to choose the right colors for your scene. You can use one of the five swatches palettes that come with the brushes or create your own custom palette.

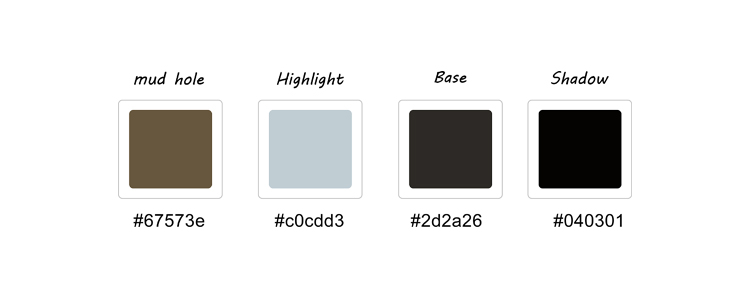
Know the names of the colors Each palette has four colors that are named according to their role in the mud painting.
Step 2: Paint the base color

To use the brushes, you need to load them into Photoshop first, you need to create a new layer above the background layer.

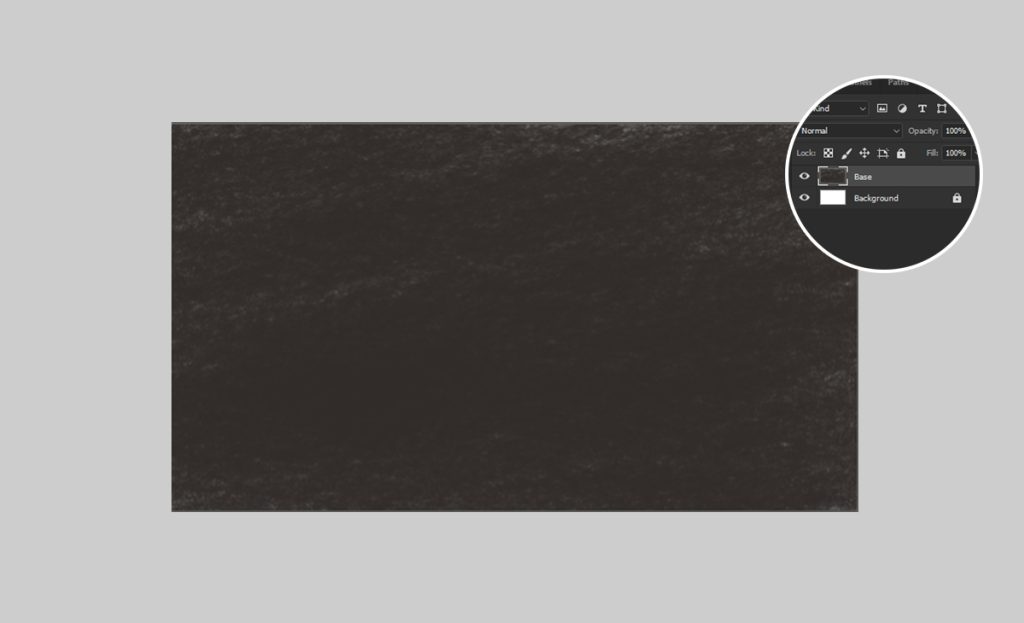
Paint the base color #2d2a26

This is the main color of the mud, usually a dark brown or gray. You will use this color to fill the background layer.

you need to create a new layer and use a brush with the color that you chose as the base. To create a new layer, go to Layer > New > Layer ( Ctrl+Shift+N on your keyboard)

Name the layer “Base” and click OK. Choose one of the mud brushes as you like.

To paint the base color, use the Brush Tool (B) and paint over the entire canvas with the mud brush. You can vary the pressure and direction of your strokes to create some texture and variation on the mud. You should now have a layer of mud color on your canvas.
paint mud Photoshop

Step 3: Paint the highlight

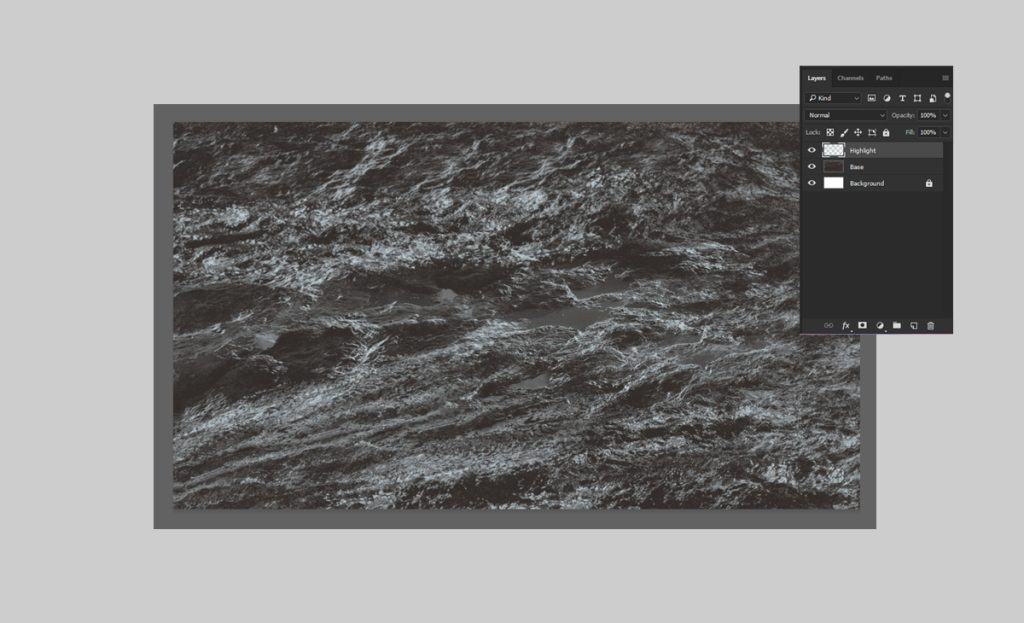
Create a layer to paint the highlight and use different Mud brushes with the color that you chose as the highlight. #c0cdd3

This is a slightly lighter color than the base. You will use this color to paint the highlights and contrast of the mud,
Name the layer “Highlight” You can use different brushes to create different effects and textures for the highlight.
paint mud Photoshop

Step 4: Paint the shadow

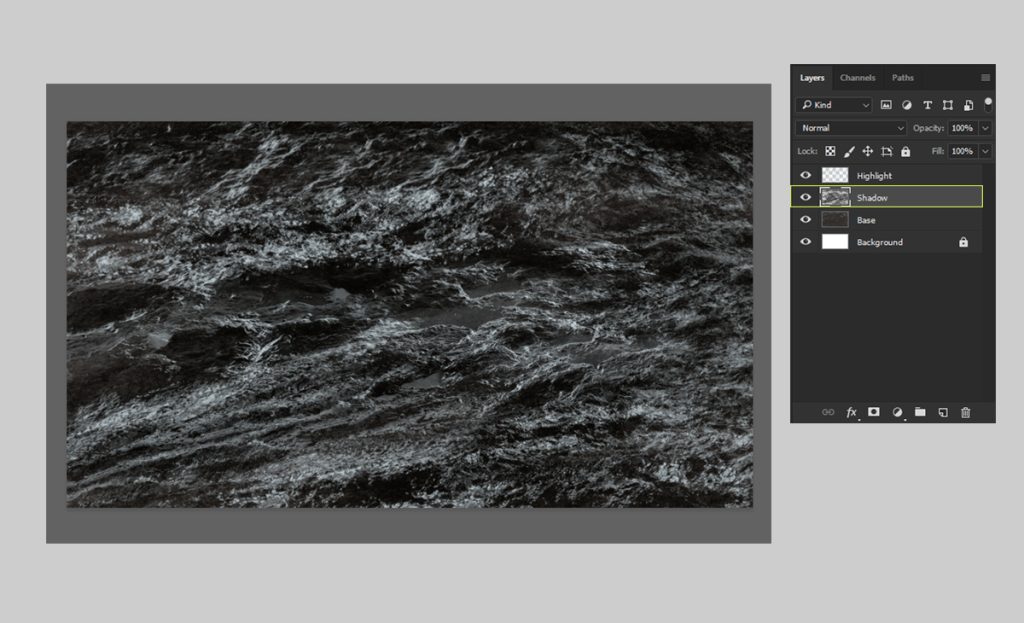
Paint “Shadow” #040301

This is the darkest color in the palette. You will use this color to paint the deepest and darkest parts of the mud, such as crevices, holes, or areas that are far from the light source. This step will make contrast and depth in your mud painting.

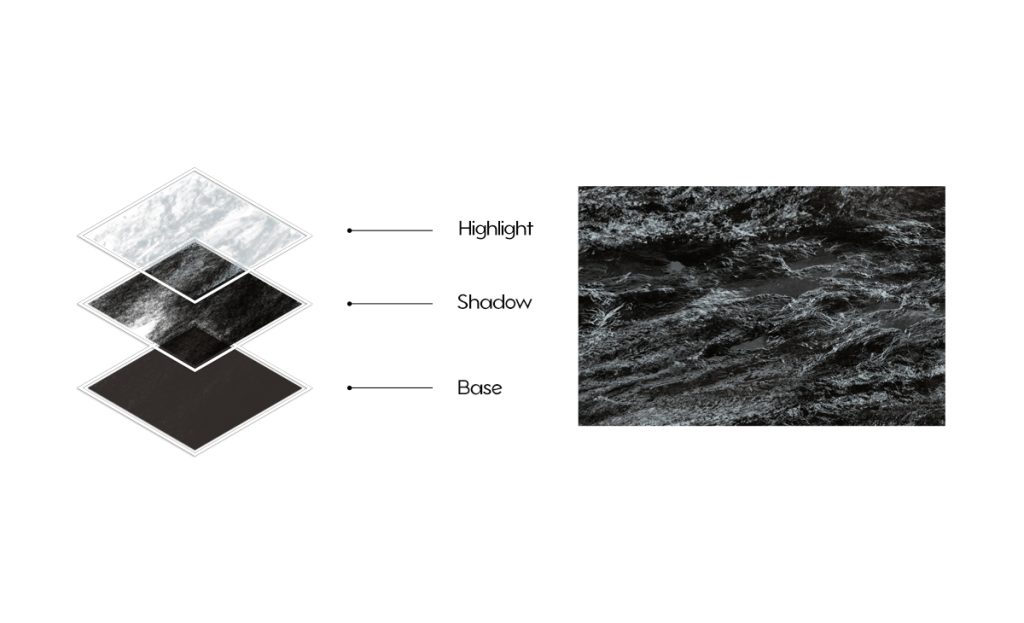
Note: Make sure that the dark colored layer (shadow) is under the light-colored layer (highlight) in the Layers panel.
paint mud Photoshop

Arrange the layers to make your mud painting look realistic
paint mud

I hope this image inspires you to create your own mud paintings with Photoshop.

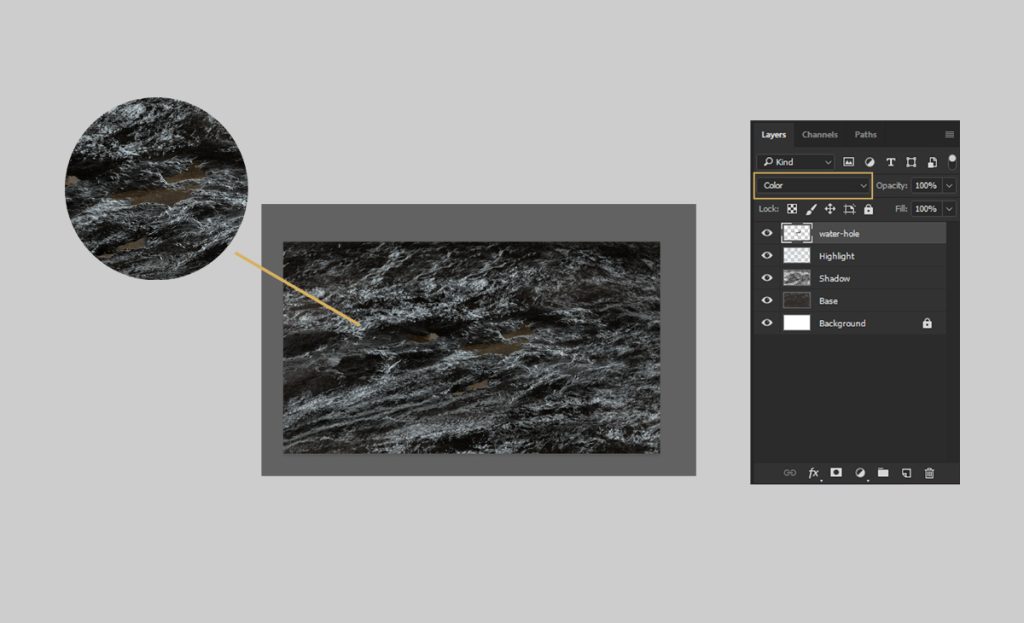
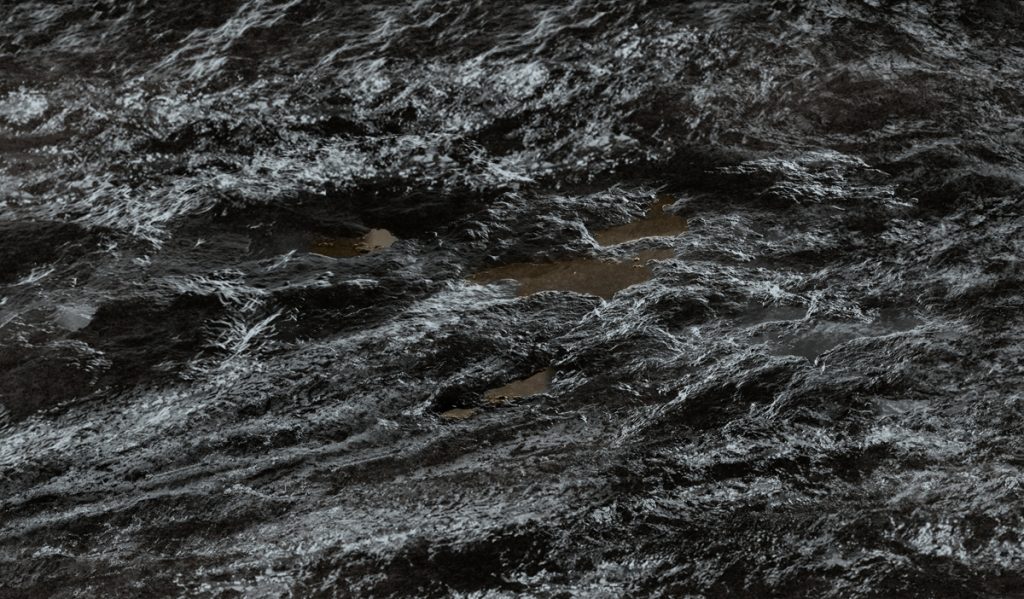
Step 5: Paint the mud hole

To paint the mud hole, you need to create a new layer and use a soft round brush with a Brown color #67573e

change the layer mode to color, go to the Layers panel and click on the drop-down menu.
Choose “Color” from the list

You have completed the tutorial on how to paint mud with Photoshop. You have learned how to use the mud brushes and the color palettes to create realistic and detailed mud effects. You have also learned how to paint a mud hole with a simple trick. You can use these techniques to create infinite scenes and scenarios with mud, such as swamps, deserts, battlefields, or anything else you can imagine.
paint mud

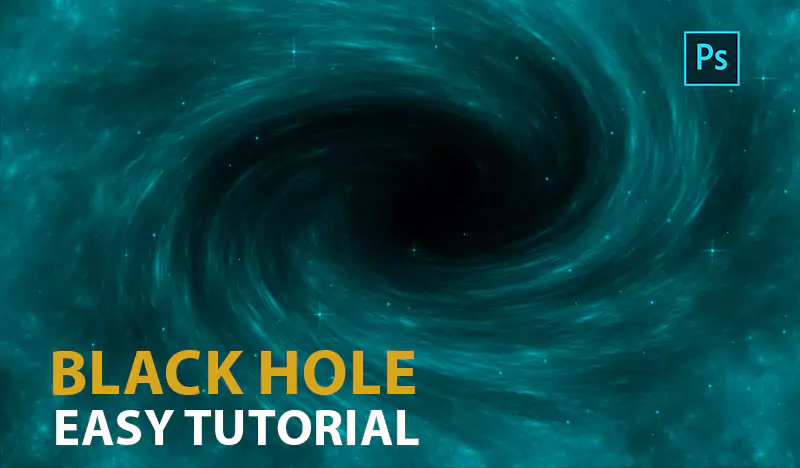
How to Create a Black Hole in Photoshop

How to Create a Black Hole in Photoshop!

This tutorial will also introduce you to a new technique for Photoshop that I have developed to create realistic black hole in photoshop with brushes. This technique is simple and effective, and it can be used to create different types of black holes with different colors and shapes. You will be amazed by the results you can achieve with this technique and the brush set. So, if you are ready to learn something new and exciting, let’s begin this tutorial!

Tutorial Resources 

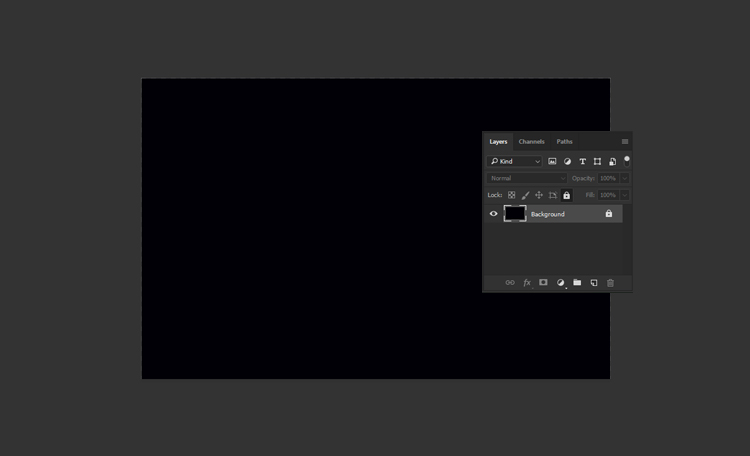
Step 1: Create a new file and a dark background color.

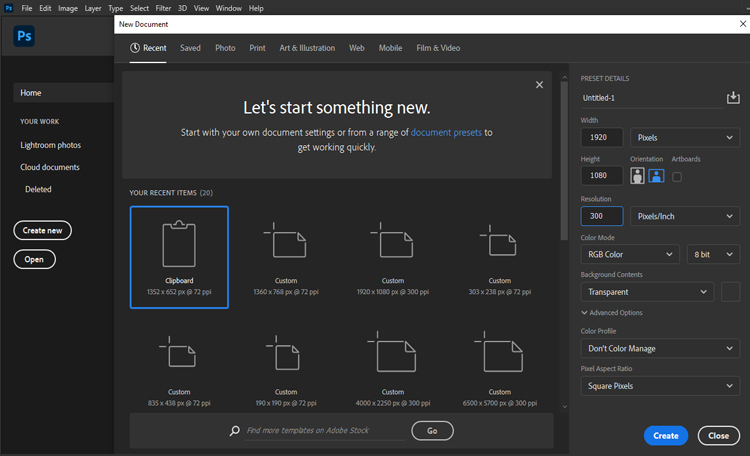
The first step is to create a new file in Photoshop with the dimensions of your choice.

I’m using a 2500 x 1605 PX file with a resolution of 300 dpi. You can use any size you want, but make sure it is large enough to fit your space scene.

Next, we need to fill the background with a dark color. You can use any dark color you like, but I recommend using a very dark blue or purple to create some contrast with the stars and planets later. To fill the background, select the Paint Bucket Tool (G) and click on the canvas.

You should have something like this:

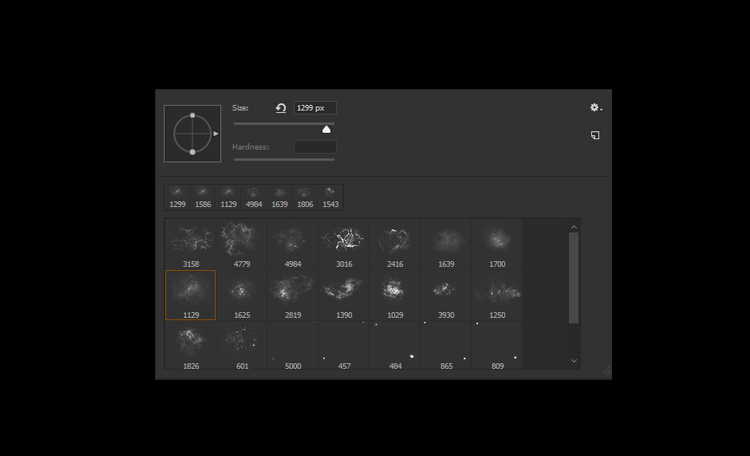
Step 2: Import our brushes and select the nebula you want.

The next step is import brushes.

Now, we are going to use one of the brushes to create a nebula. A nebula is a cloud of dust and gas in space.

To create a nebula, select the Brush Tool (B) and choose one of the brushes from the set, which looks like this.

Step 3: Paint with nebula in a circular movement

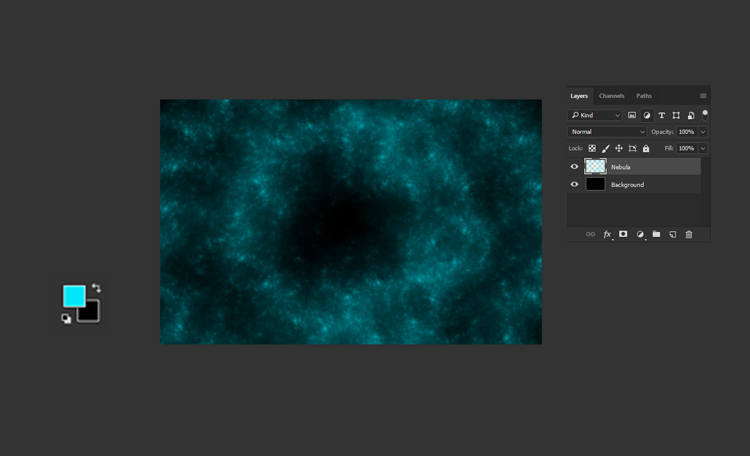
The next step is to change the foreground color to #00e5f8 , which is a bright cyan color. You can use the Color Picker or type the hex code in the box.

Next, create a new layer (Ctrl+Shift+N) and name it Nebula. On this layer,

Paint with the nebula brush in a circular motion around the center of the canvas to create a more dynamic and realistic effect.

Step 4: Merge layers and apply twirl filter.

The next step is to merge the nebula layers and apply a twirl filter to create a spiral effect.

To do this, select both nebula layers in the Layers panel and press Ctrl+E to merge them. Then,


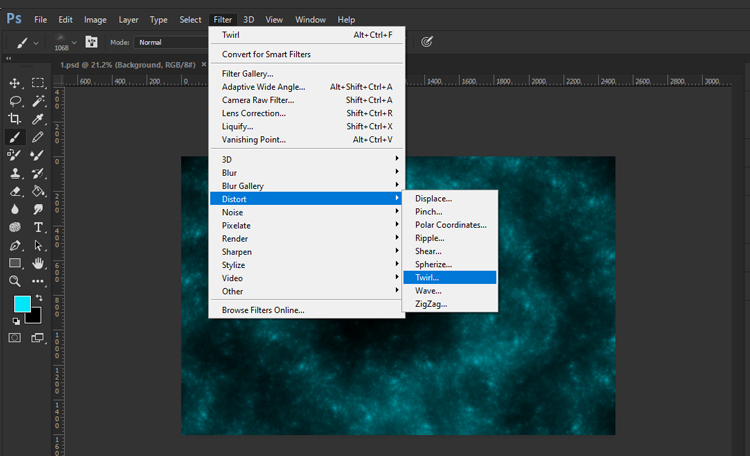
go to Filter > Distort > Twirl

and adjust the angle as you like.

black hole in photoshop

Step 5: Use angle to create a black hole.

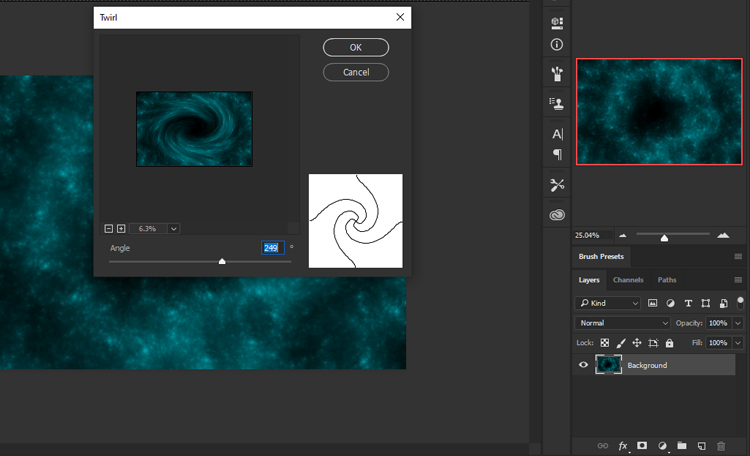
The angle is the amount of rotation that the filter applies to the image. The higher the angle, the more twisted the image becomes. The lower the angle, the less twisted the image becomes. You can use any angle you want, but I recommend using a high angle to create a spiral effect.

I’m using an angle of 249 degrees. You should have something like this.


Step 6: Create a new layer and paint some edges in the corner.

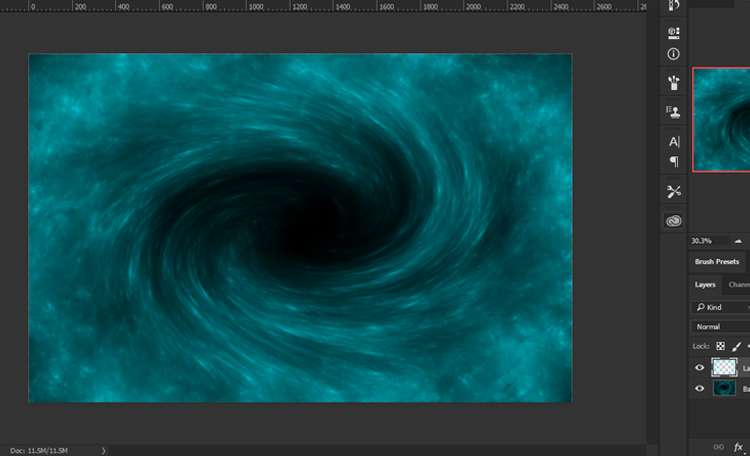
The next step is to create a new layer and use the same nebula brush to paint some edges in the corner of the canvas. This will add some depth and interest to your space scene. To do this, select the Brush Tool (B) and choose the same nebula brush as before.

Then, create a new layer. On this layer, click and drag the brush along the edges of the canvas. You can use any color you like, but I recommend using a lighter color than the background. You should have something like this:

black hole in photoshop

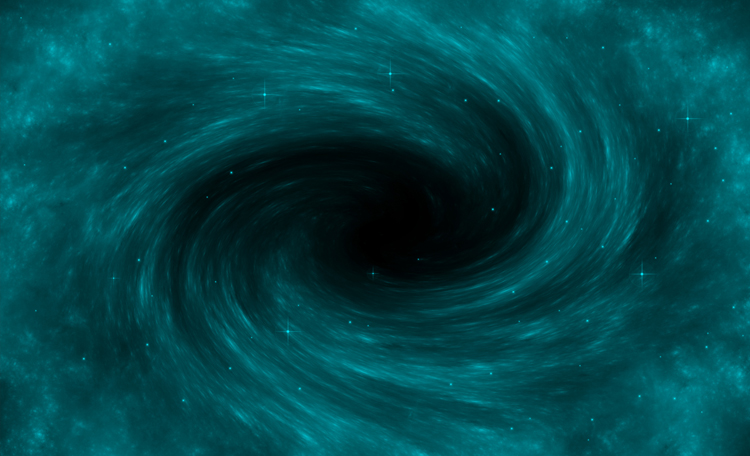
Next, add some stars to your space scene using the dynamic stars brush in this pack. This brush will create different sizes and brightness of stars depending on the pressure and speed of your stroke.


Congratulations!


You have successfully created a stunning black hole scene in Photoshop using a custom brush set for space. I hope you enjoyed this tutorial and learned something new. Thank you for following along!

How to make Realistic bubbles in Photoshop

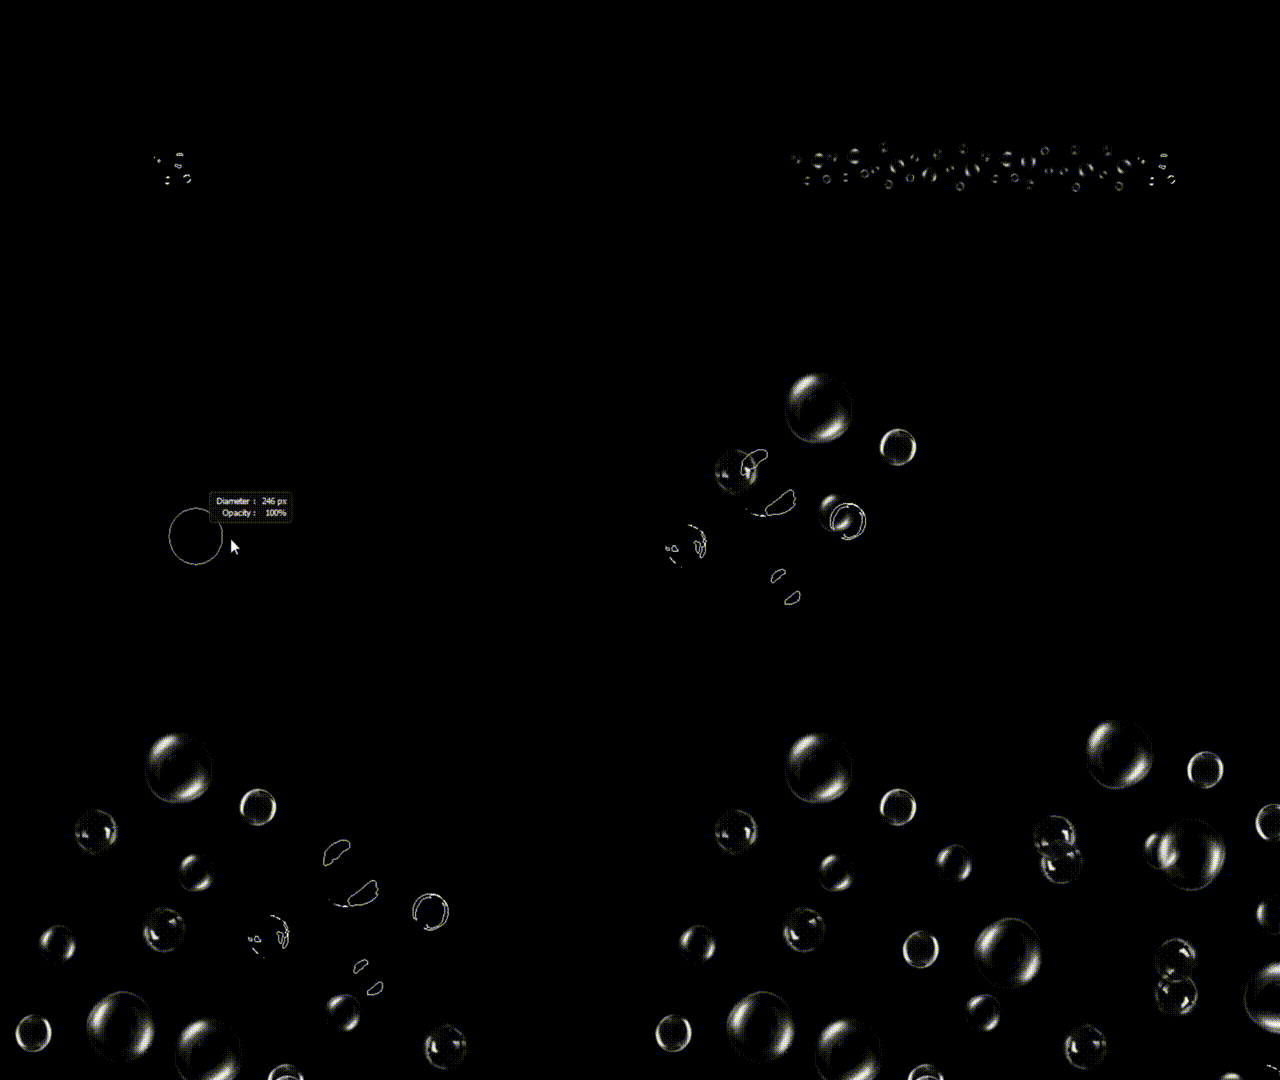
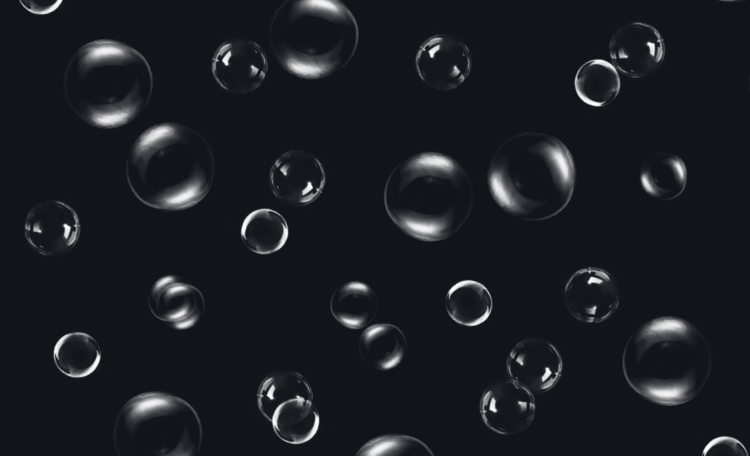
Do you want to learn how to create realistic bubbles in Photoshop? Bubbles can add a fun and magical touch to any photo, but they can be tricky to make look natural and convincing. In this tutorial, I will show you how to use my brushes and techniques to create amazing bubble effects in Photoshop. You will also learn how to customize the colors, shapes, and sizes of the bubbles to fit your style. By the end of this tutorial, you will be able to transform any photo into a bubbly masterpiece. Let’s dive in!

Tutorial Resources
Bubbles Brushes
12 high quality Dynamic water Bubbles brushes + 6 Pattern, you can Paint with Bubbles and change your Bubbles colors to get a colorful pack right away!


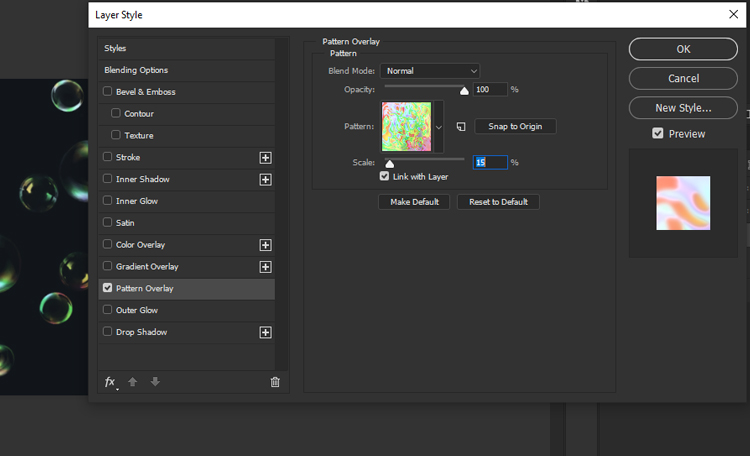
Before we start, you need to import a pattern that we will use for the bubbles.

Now we will apply the pattern effect to the bubbles. To do that, you need to select the layer to right-click on the layer with the bubbles and select Blending Options. Then, choose Pattern from the list of blend modes and click OK.


How to Import Gradients into Photoshop

Gradients are a powerful tool in Photoshop that can help you create stunning effects on your images. But did you know that you can also import gradients from other sources and use them in your projects? In this tutorial, I will show you how to install gradients in Photoshop and how to use them to enhance your photos. You will learn how to access the Gradients panel, how to import gradients from a GRD file, and how to apply them as gradient layers or fill colors. Whether you are a beginner or an expert, you will find this tutorial useful and fun. Let’s get started!

Step 1

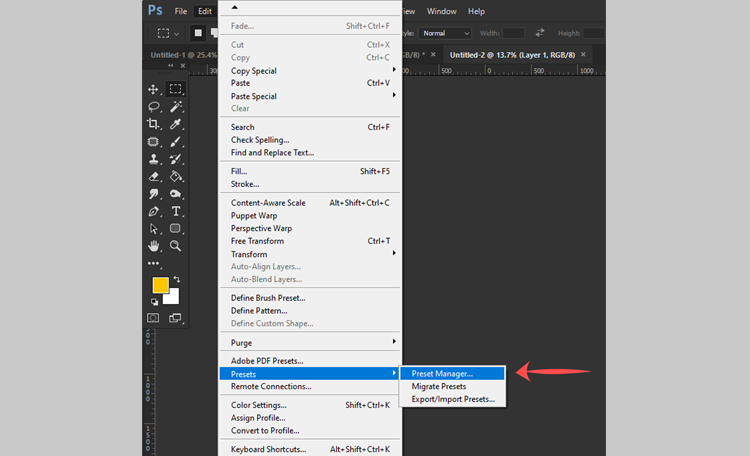
Go up to the Edit > Preset Manager

Step 2

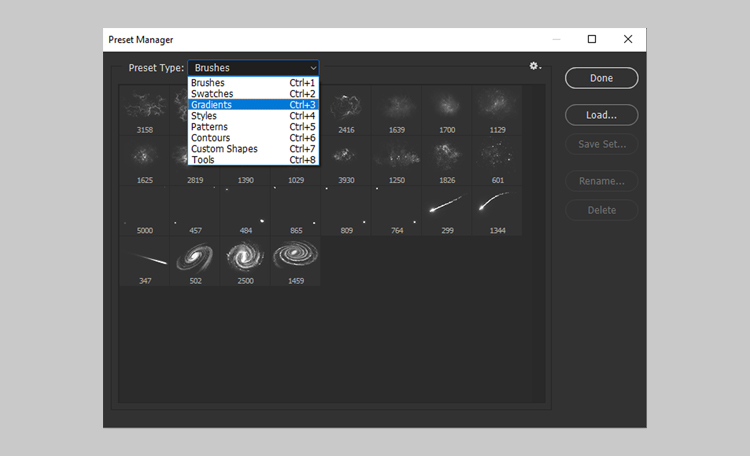
From the Preset type drop down, select Gradients.

Step 3

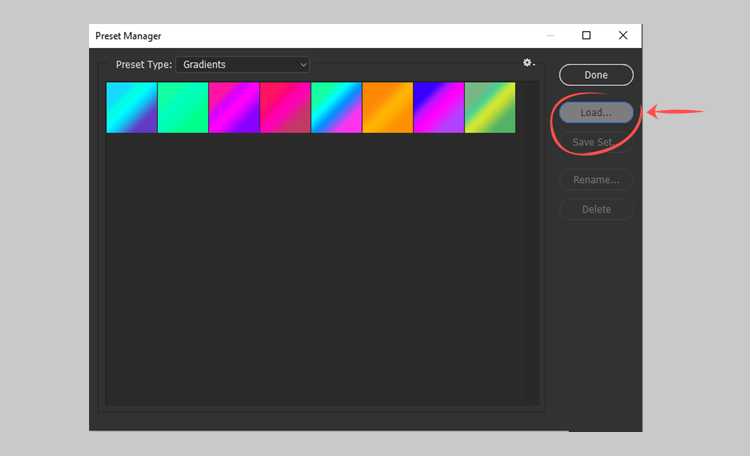
Click on Load and select the gradient file (GRD FILES) Click on open, your new gradients will be added.

How to install Photoshop Brushes

Installing Photoshop Brushes For (Photoshop CC 2020 and newer)

in This blog I will show you how to install Photoshop brushes.

This information applies to Adobe Photoshop CC 2019 through Photoshop 2022.
To get started, you’ll need to first download brushes for Photoshop, find your brush in our store

, and download our Photoshop brushes or brush pack you’ve chosen.
Launch Photoshop and create a new file or open an existing one!


how to install photoshop brushes


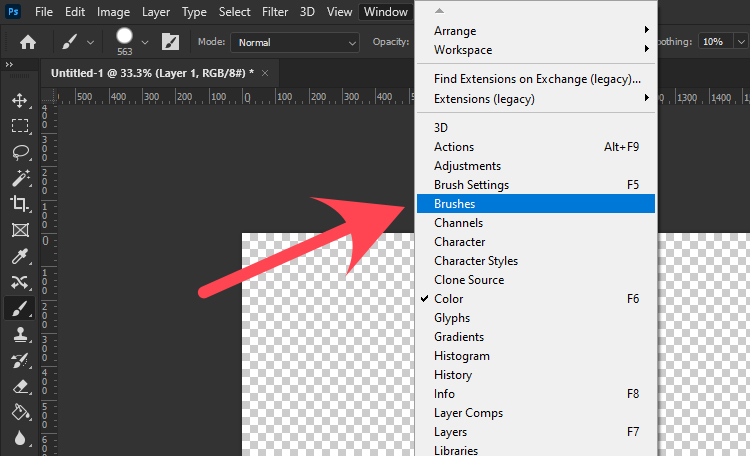
1. Open the Brushes panel, by going to Window > Brushes.


how to install photoshop brushes


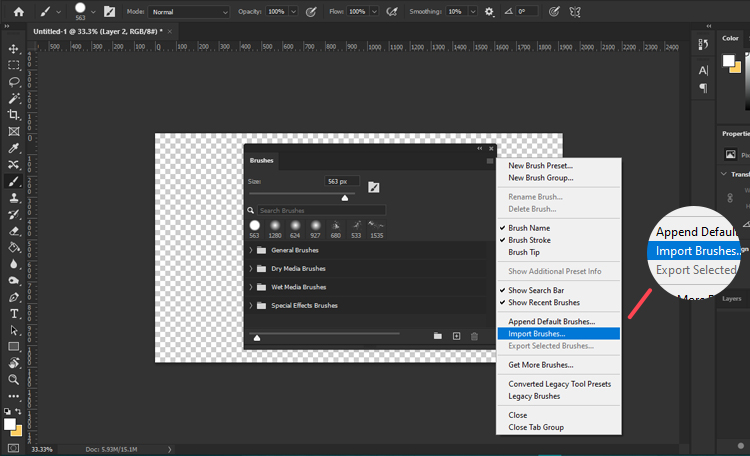
2. click the hamburger menu on the top right corner then click Import Brushes.


how to install photoshop brushes


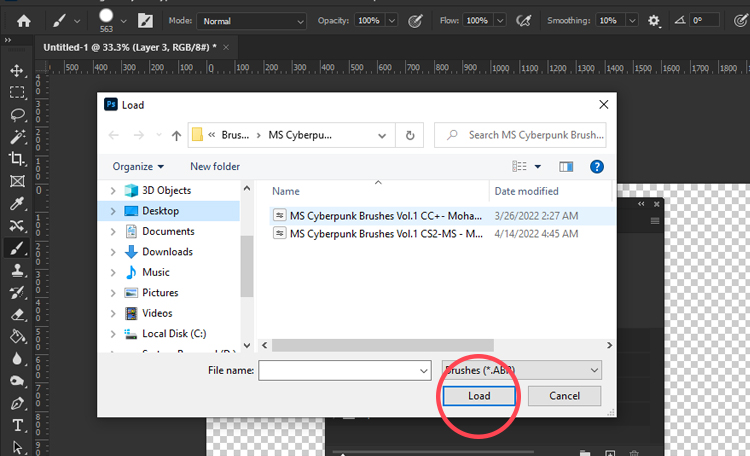
3. Locate your brush pack to select the ABR file of the brush pack.

4. then select “Load” button to insert them into Photoshop.


how to install photoshop brushes


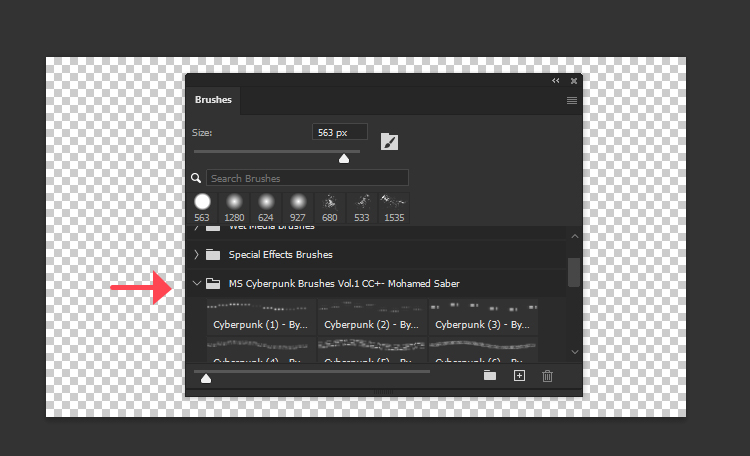
5.The new brush (or brush pack) displays in the Brushes window.

how to install photoshop brushes

How to install Photoshop Brushes in Older Photoshop Versions (CC 2019 and Older)

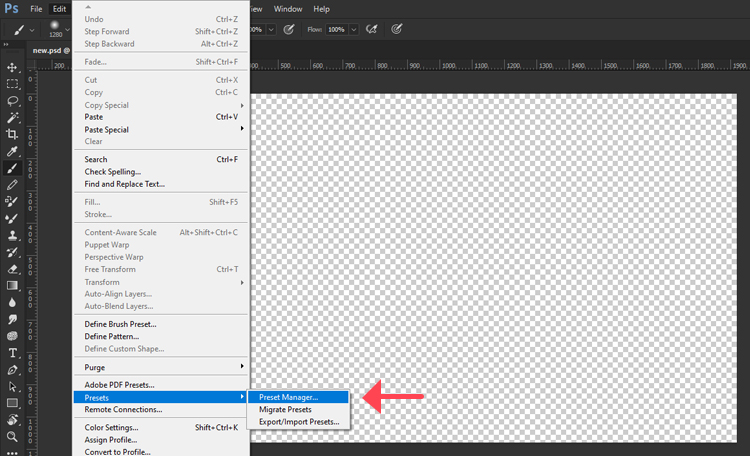
1. going to Edit > Presets > Preset Manager.

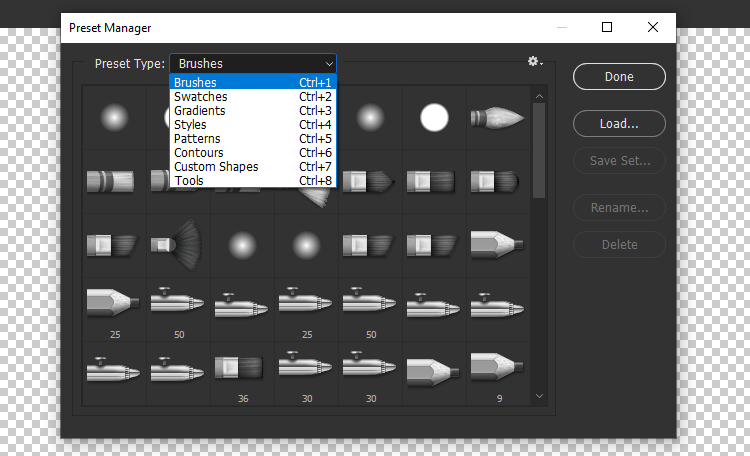
2.select from Preset Type menu “Brushes” or Ctrl+1(in keyboard).

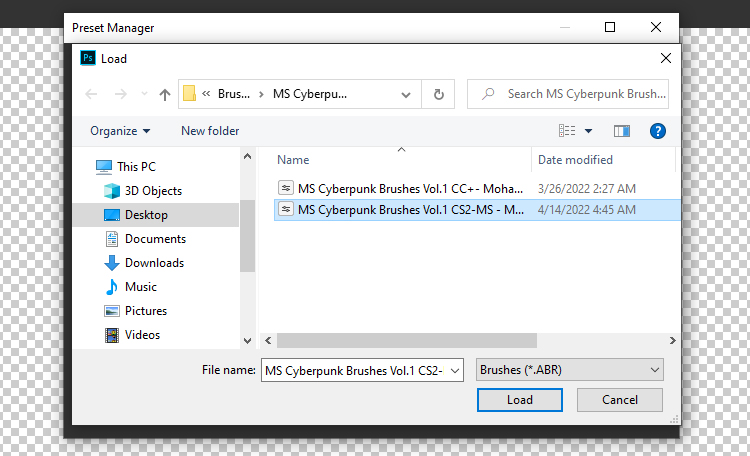
3.then select “Load” button to insert your brushes.

4.Locate your ABR file then Double Click ABR File

Enjoy!
read our blogs