How to import ABR Brushes into Procreate

Import ABR brushes into Procreate

Step 1: Explore and Download Our Brushes

To begin your creative journey, you’ll need to find and download the ABR brushes you’d like to use. You can explore our extensive collection of high-quality brushes here. Once you’ve found the perfect set, download the ABR file to your device.

Step 2: Locate the ABR File

Once you’ve downloaded the ABR file, locate it on your device. If you’re using a computer, you may need to transfer the file to your iPad via cloud storage (such as iCloud, Dropbox, or Google Drive) or using AirDrop.

Step 3: Open Procreate

Launch the Procreate app on your iPad. Ensure you have the latest version of Procreate for the best experience and compatibility with ABR files.

Step 4: Import the Brushes
  1. Open your Procreate canvas or create a new one.
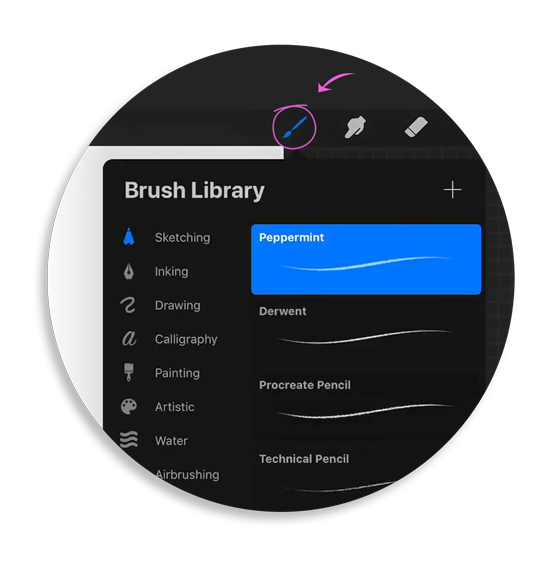
  2. Tap on the Brush icon to open the Brush Library.
  3. At the top right corner of the Brush Library, tap on the + symbol to create a new brush set.
  4. Tap on the newly created brush set to open it.
  5. Now, tap on the Import button located at the top right of the brush set panel.
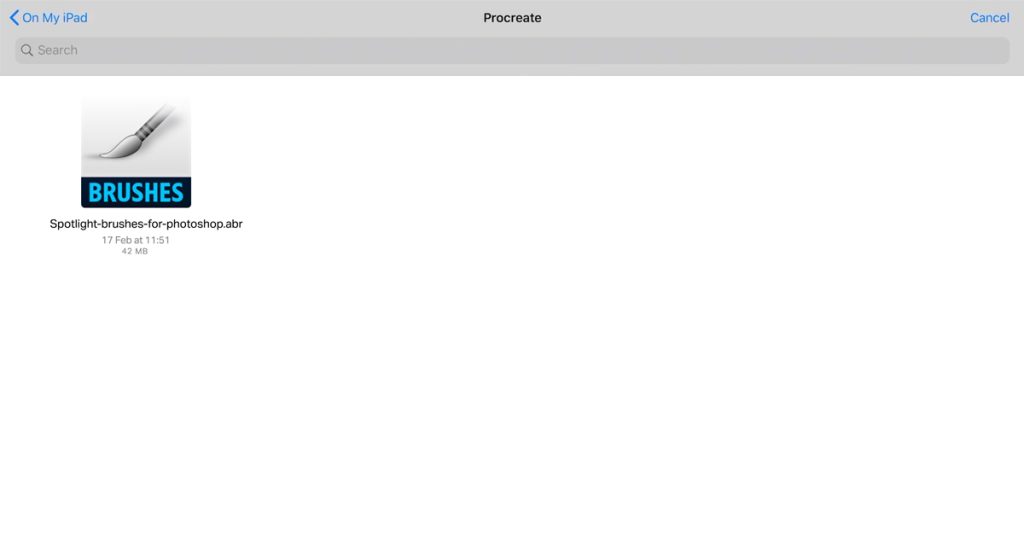
  6. Navigate to the location where you saved your ABR file (e.g., iCloud Drive, Dropbox, etc.).
  7. Select the ABR file to import it into Procreate.
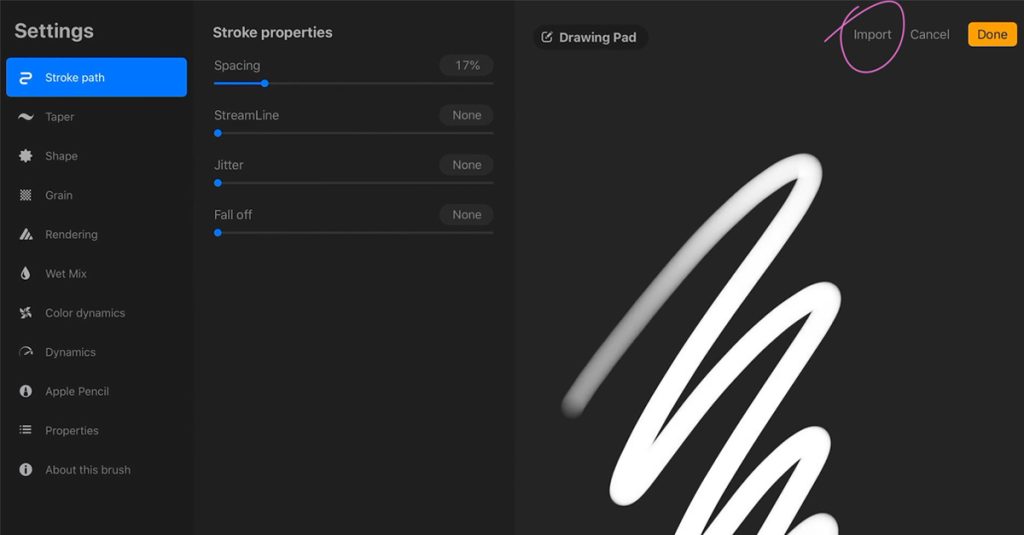
Import ABR brushes into Procreate

Step 5: Organize and Use Your Brushes

After importing, you’ll see your new brushes within the selected brush set in Procreate. You can rename the brush set for better organization. To start using the brushes:

  1. Select the brush you want to use from the imported set.
  2. Adjust the brush settings as needed.
  3. Start creating your artwork with your newly imported brushes!

How to Import ABR Brushes into Procreate on iPad

Locate the ABR file on your iPad or cloud storage.

Hold your finger on the brush file and select Share from the options menu
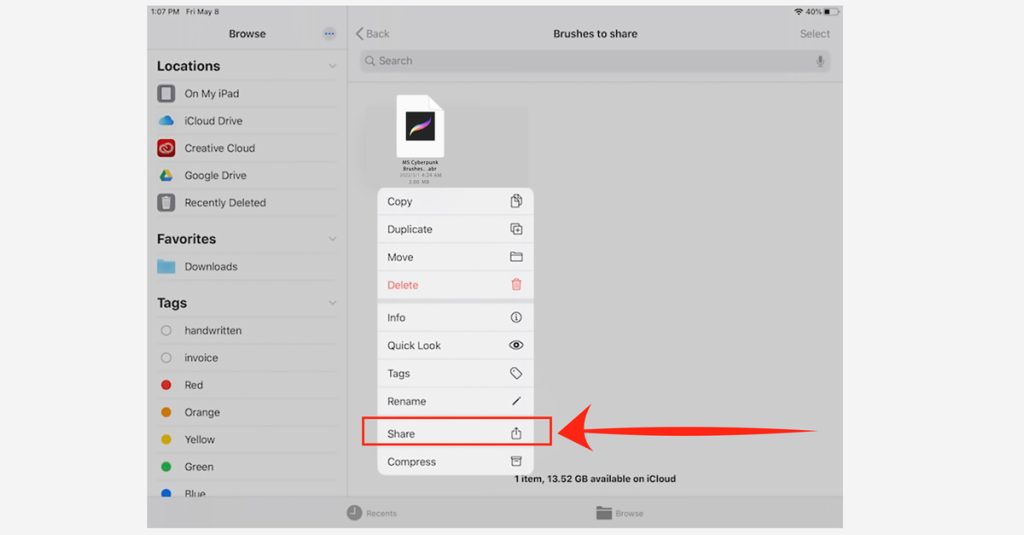
Import ABR brushes into Procreate

Choose Procreate from the list of apps.
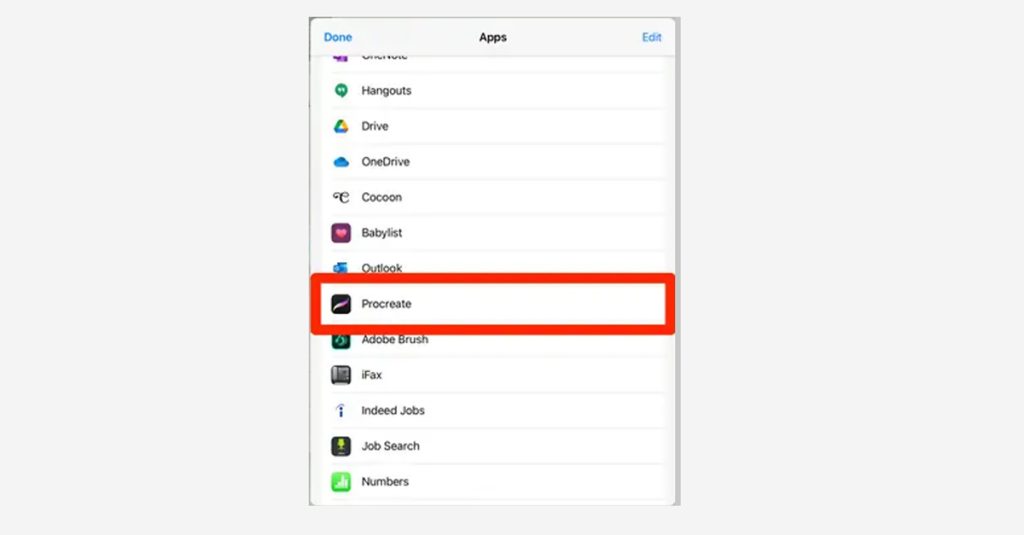
Import ABR brushes into Procreate

Procreate will automatically import the brushes into your selected brush set.

Congratulations!

You’ve successfully imported ABR brushes into Procreate.

Now you can enjoy a wider variety of tools and enhance your digital art projects.

Happy creating!

“Learn how to import ABR brushes into Photoshop with our easy step-by-step guide.
Master the Waves: Ocean Photoshop Tutorial

Unleash Your Inner Artist: Ocean Photoshop Tutorial with Premium Brushes

Welcome to our comprehensive ocean Photoshop tutorial! Whether you’re an experienced digital artist or a newcomer eager to dive into the world of seascapes, this guide is designed for you. In this tutorial, we’ll explore the step-by-step process of painting an ocean scene, using our specially designed brushes to bring the waves to life. You’ll learn how to create realistic waves, shimmering reflections, and dynamic light effects that will transform your digital canvas into a breathtaking masterpiece. Ready to embark on this creative journey? Let’s get started!

Tutorial Assets


Step 1

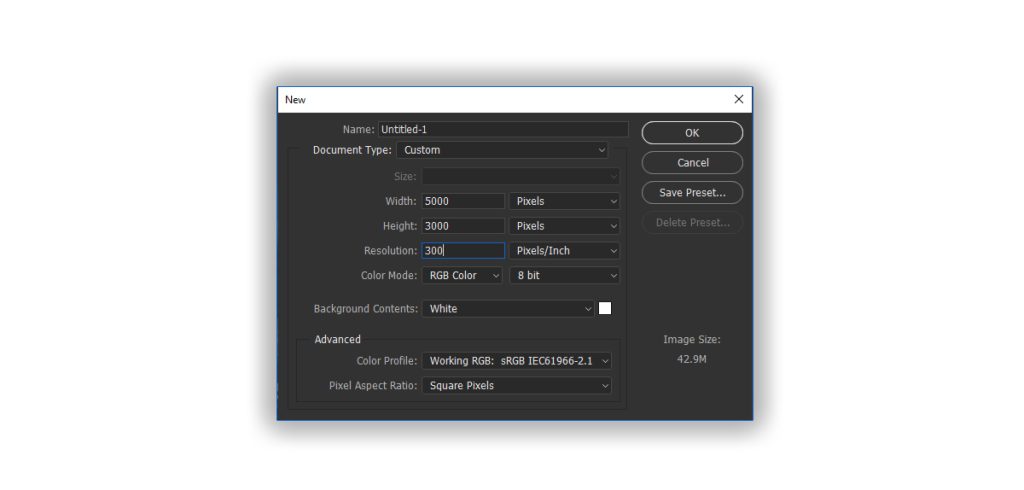
Open a New Document in Photoshop at 5000 x 3000 pixels and 300 dpi.

ocean photoshop tutorial

Step 2: Choosing Your Color Palette

For this tutorial, I used these colors to bring the ocean scene to life. Here are the color codes:

  • Base color: #26424d
  • Highlight: #7fb8ab
  • Highlight 2: #4bbaa5
  • Shadow 1: #1a333d
  • Shadow 2: #0f2025

Step 3: Fill the Background with the Base Color

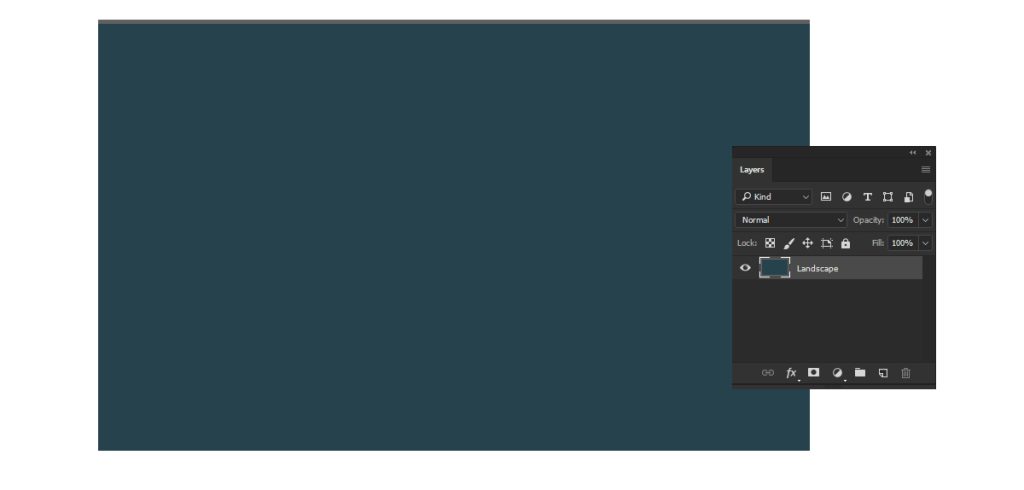
Use the Paint Bucket tool to fill the background with your base color: #26424D. This deep, oceanic hue will serve as the foundation for your artwork, setting the tone for your sea painting.

ocean photoshop tutorial

Step 3: Adding Highlights with the Ocean Brush Pack

To use the brushes, you need to load them into Photoshop
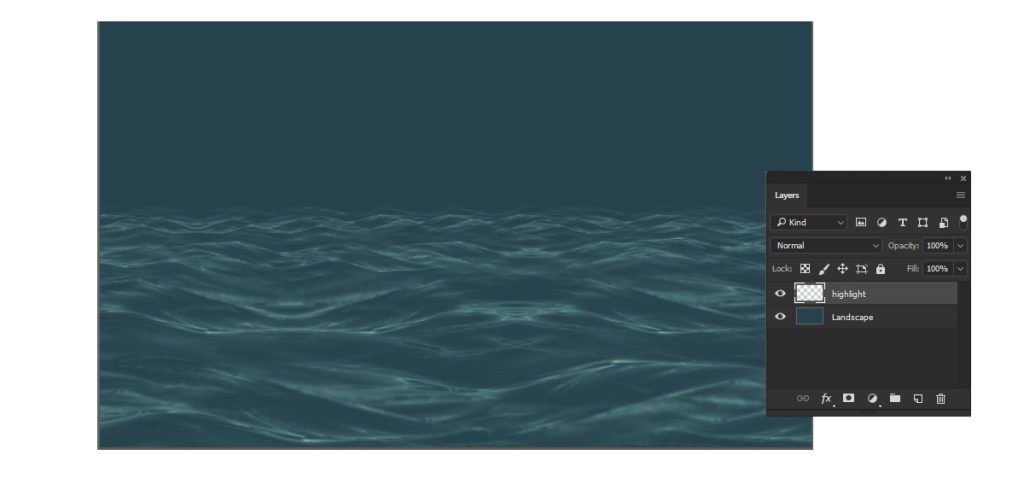
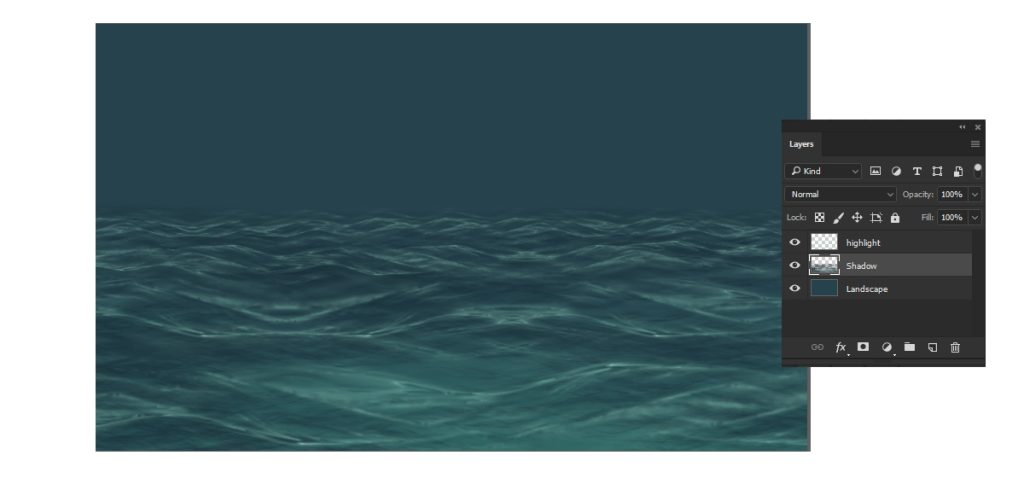
First, create a new layer and rename it “Highlight.” Using any brush from the Ocean Brush Pack, set your foreground color to #7FB8AB. Select the Brush Tool (B) and start painting the highlight areas in your ocean scene. This color will add a touch of light and vibrancy, mimicking the way sunlight dances on the waves.

ocean photoshop tutorial

Step 4: Painting the Shadows

Create a new layer and name it “Shadow.” Place this layer below the “Highlight” layer. Set your shadow color to #1A333D and, using the same brush from the Ocean Brush Pack, paint the shadow areas.
This will add depth and dimension to your ocean scene, enhancing the contrast and making the highlights stand out even more.

ocean photoshop tutorial

Step 5: Adding Secondary Highlights

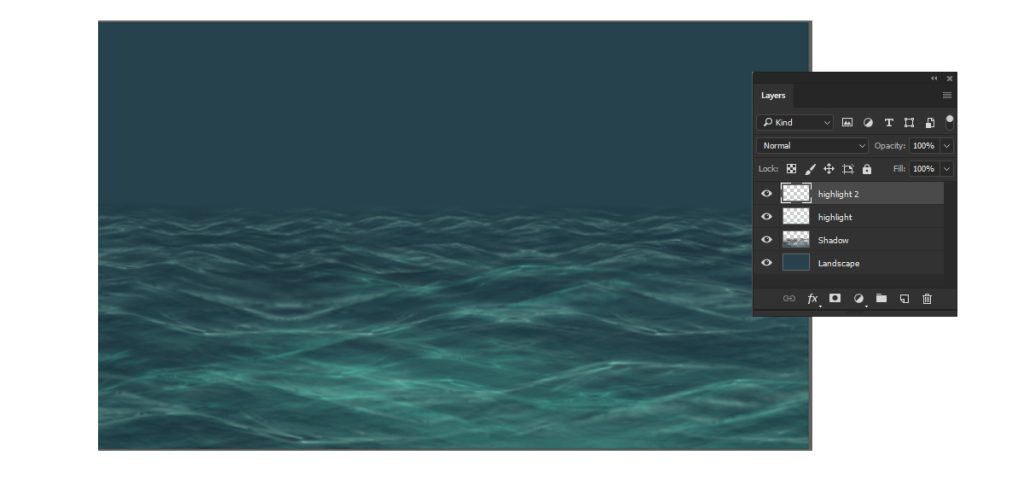
Create a new layer and rename it “Highlight 2.” Position this layer above the “Highlight” layer. Set your shadow color to #4bbaa5, paint your secondary highlights in this layer.
This will enhance the light and detail in your ocean scene, adding an extra dimension to your artwork.

ocean photoshop tutorial

Step 6: Adding Second Layer of Shadows

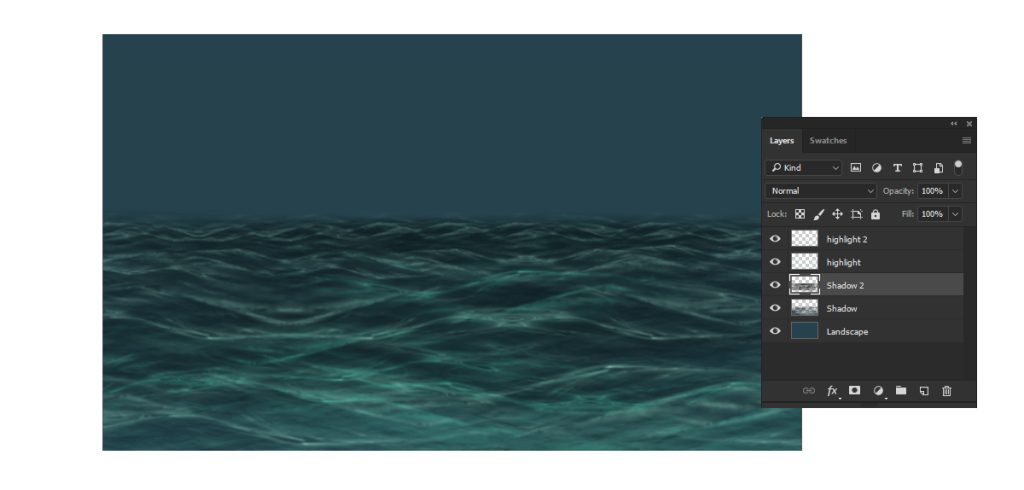
Create a new layer and rename it “Shadow 2.” Place this layer above the “Shadow” layer. Set your shadow color to #0F2025. , paint the shadow areas to add more contrast and depth to your ocean scene.
This additional layer of shadows will enhance the dimensionality of your artwork, making it even more realistic.

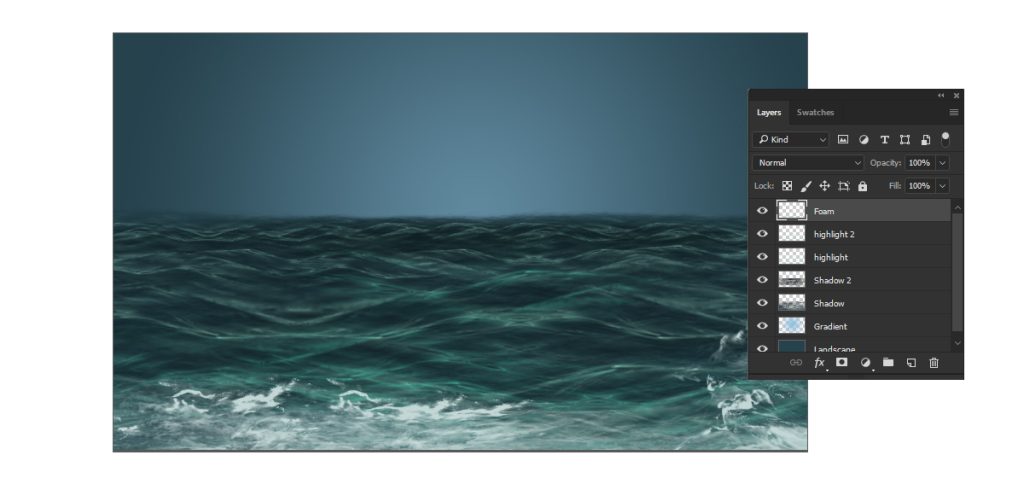
Step 7: Painting the Light

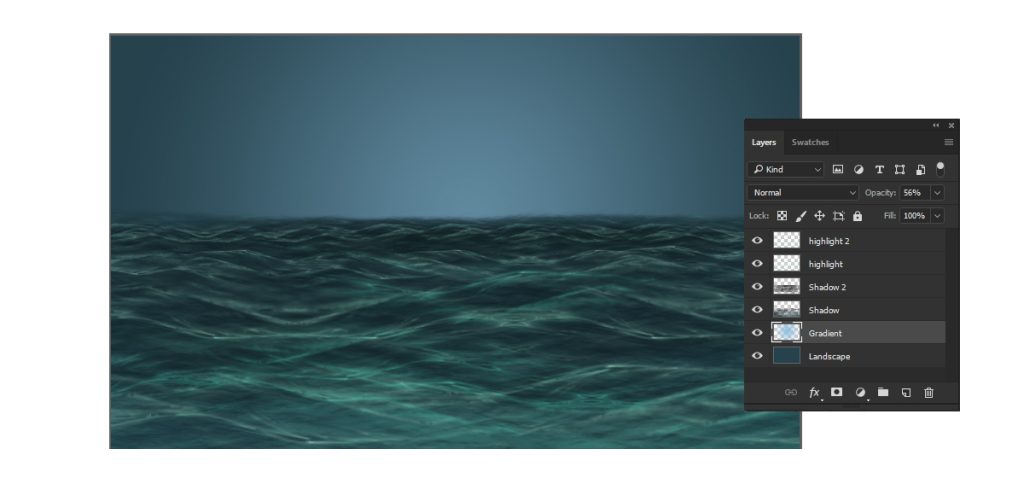
Create a new layer and position it below the “Highlight” layer. Select the Gradient Tool and choose the Radial Gradient option.

Use this color for the light: #5e869b. Paint the direction of the light in the sky, which will give a sense of illumination and add depth to your ocean scene.

Step 8: Painting the Foam

Create a new layer and place it above the “Highlight 2” layer.
Select the Foam Brush from the Ocean Brush Pack, set your foreground color to #FFFFFF (white), and start painting the foam.
This will add the final touch to your ocean waves, creating realistic and dynamic foam patterns that enhance the overall scene.

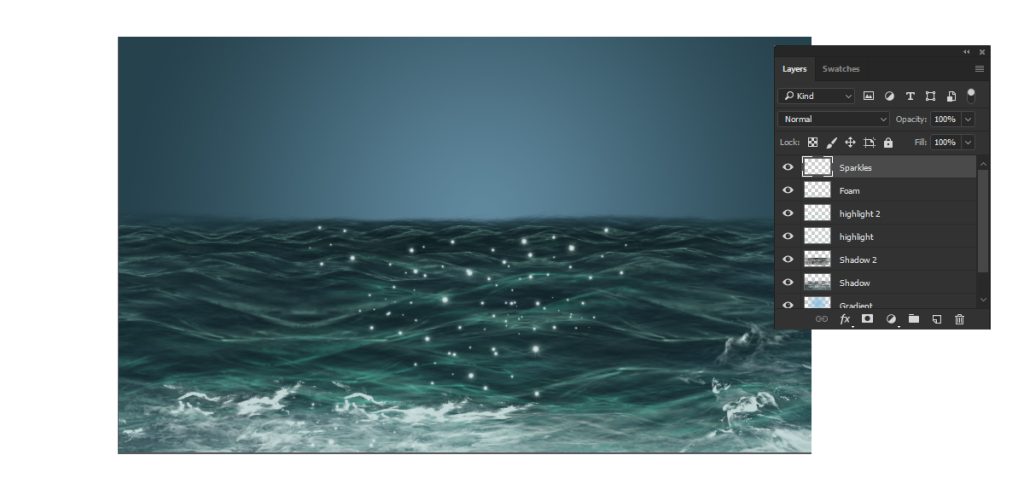
Step 9: Adding the Glitter

Create a new layer and set it above all the previous layers.
Select a glitter brush from the Ocean Brush Pack and set your foreground color to #FFFFFF (white).
Use the brush to add glittering highlights to the ocean, mimicking the sparkle of sunlight on the water.
This will add a magical and dynamic touch to your artwork, making it truly stand out.

ocean photoshop tutorial

Congratulations! Your Ocean Painting Tutorial is Complete

Great job following along! You’ve successfully created a stunning ocean scene in Photoshop using our premium brushes. If you want to see the entire process in action, you can watch the video tutorial here.

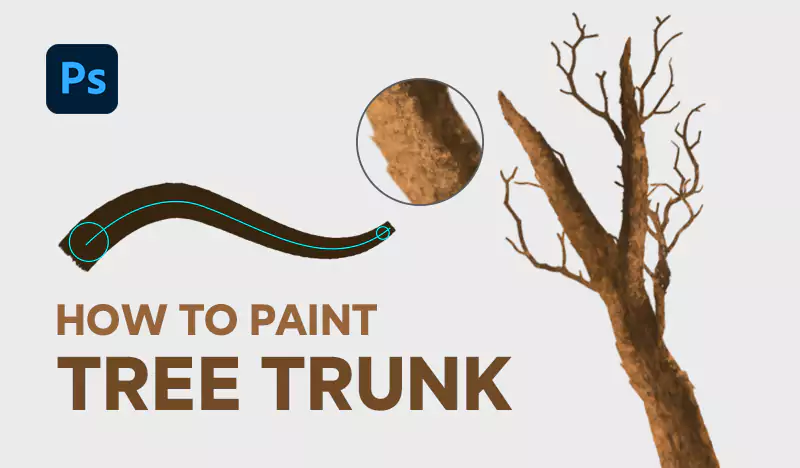
How to paint tree trunk in photoshop

Introduction In this tutorial, we will guide you through the process of painting a realistic tree trunk using our specialized foliage brush pack. These brushes are designed to create authentic textures, helping you achieve stunning results with ease. Whether you’re enhancing a digital forest or adding a single tree to your artwork, this guide will ensure your tree trunk looks lifelike and detailed.

Tutorial Assets

Step 1: Painting the Tree Trunk

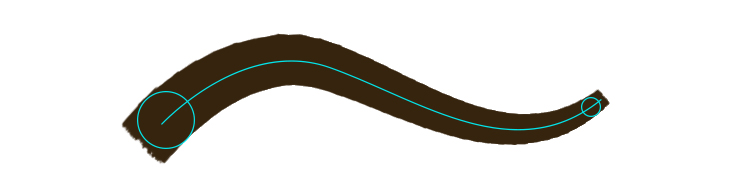
start by selecting the tree trunk brush from the foliage brush pack

To use the brushes, you need to load them into Photoshop first.

The difference between the two brushes lies in the edges of the resulting tree trunk: one brush produces softer edges, while the other creates more defined edges.

This brush is designed to create a faded effect, mimicking the natural texture of a real tree trunk. As you start painting, you will notice the brush blends seamlessly, providing a realistic base layer for your tree.

Step 2: Drawing Sub-Trunks

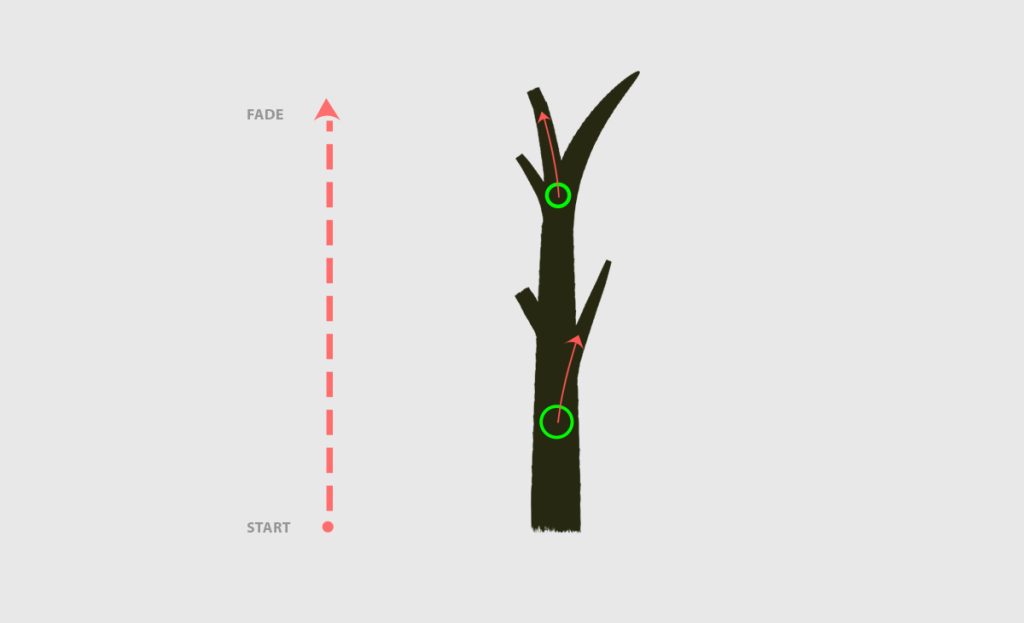
  • Keep the same brush to draw the sub-trunks of the tree.
  • When you want to create a smaller trunk, start at the bottom of the tree, as shown in the green circle. This technique works realistically since trees grow from the bottom up.

Step 3: Drawing Tree Branches

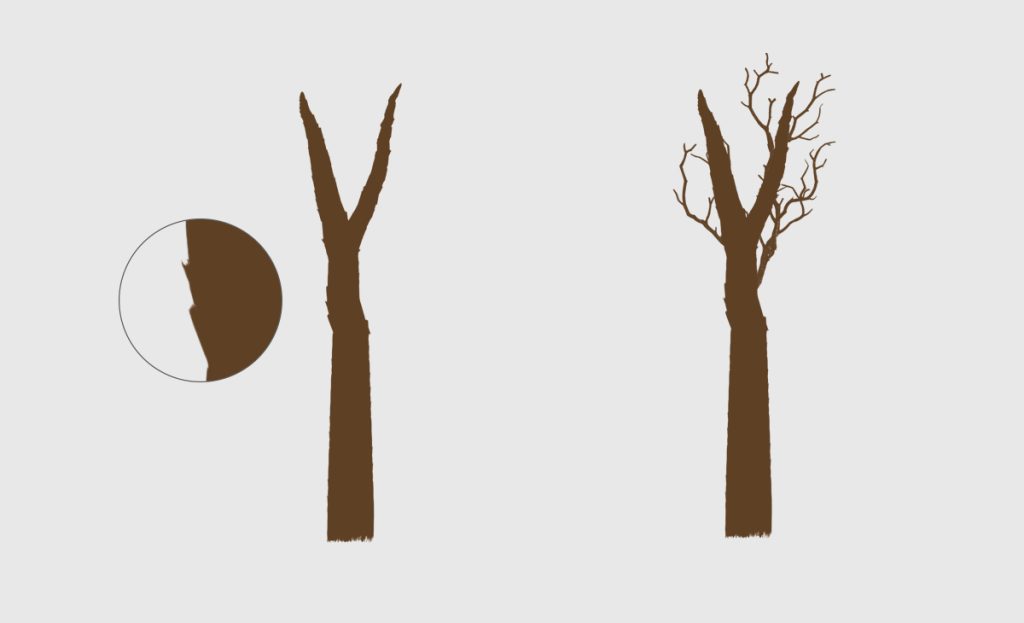
At this point, we’re going to draw the branches. Use any of the brushes from the foliage brush pack to create them.

Just practice with these brushes; they are designed to be easy to use.

Keep the same color as the tree trunk to ensure consistency.

Notice that the dark color should be under the texture layer to add depth and realism to your branches.

write step 4 : paint tree trunk texture use tree trunk texture brushes and 3a2715 for dark colors and ac6e33 for light color a

Here’s the next step for painting tree trunk texture:

Step 4: Painting Tree Trunk Texture

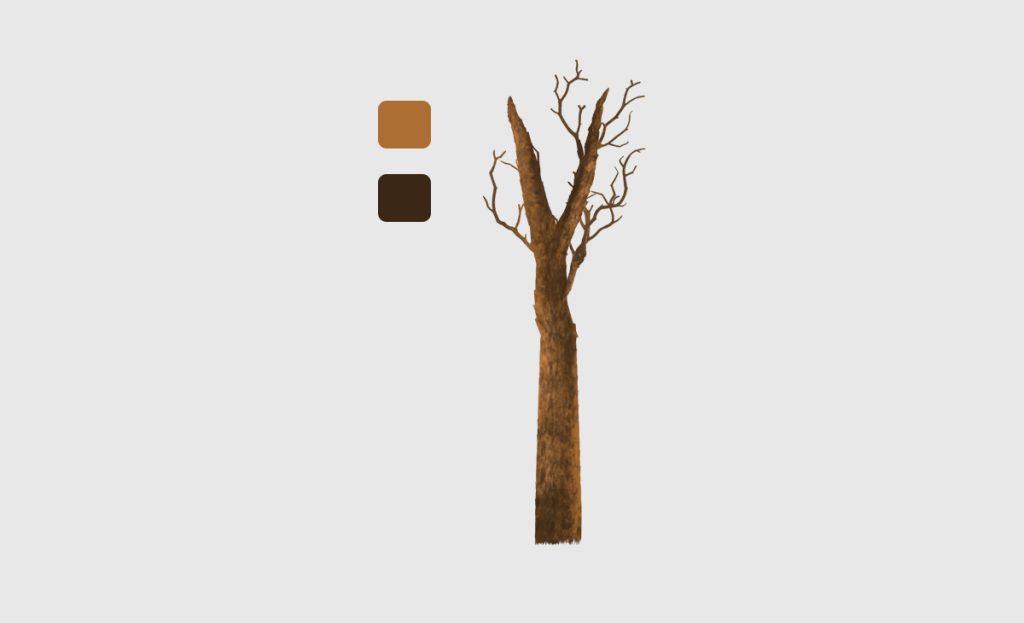
  • Use the tree trunk texture brushes from your foliage brush pack to add detailed textures to the trunk.
  • For the dark areas, select the color #3a2715. This will add depth and shadow to the trunk.
  • For the lighter areas, use the color #ac6e33. This will highlight the raised parts of the texture, adding a realistic effect.
  • Carefully apply the texture, blending the dark and light colors to mimic the natural variations found in real tree bark.

Step 5: Adding Foliage

How to paint foliage in photoshop

How to paint foliage in photoshop

Creating realistic foliage in Photoshop can significantly enhance the depth and vibrancy of your digital artwork. This tutorial will guide you through the process, step by step, using custom brushes designed specifically for painting foliage. Whether you’re just starting out or looking to refine your skills, this guide will help you achieve stunning results.

Before you begin, ensure you have the following:

Selecting the Right Brushes

Using the right brushes is crucial for creating realistic foliage:

Choosing Colors

Choosing the right colors is essential for a natural look. Here’s a suggested palette:

  • Leaf Base Color: #2E8B57
  • Leaf Highlight Color: #76C84E
  • Leaf Shadow Color: #154734

To use the brushes, you need to load them into Photoshop.

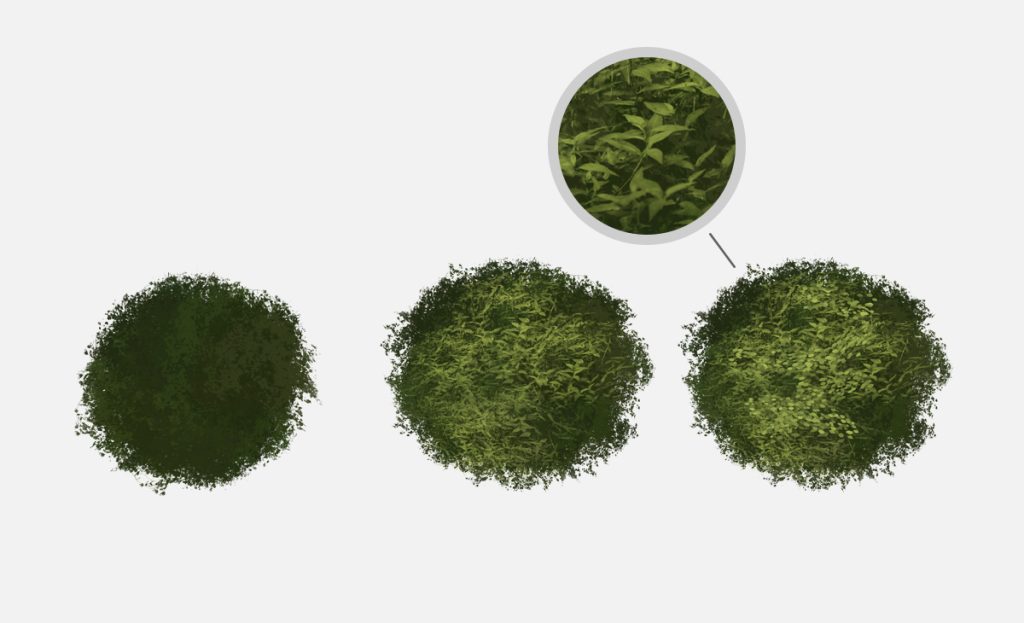
In this package, you will find a set of tree brushes designed to help you paint foliage just the way you envision it

Using these brushes, you can paint with two colors: a foreground color and a background color.
Start by setting the darker color as the foreground color for your initial painting.
Then, switch to the lighter color as the foreground color by pressing ‘X’ in Photoshop and painting Leaves for added depth and realism.

How to paint foliage in photoshop

How to Paint Realistic Grass in Photoshop

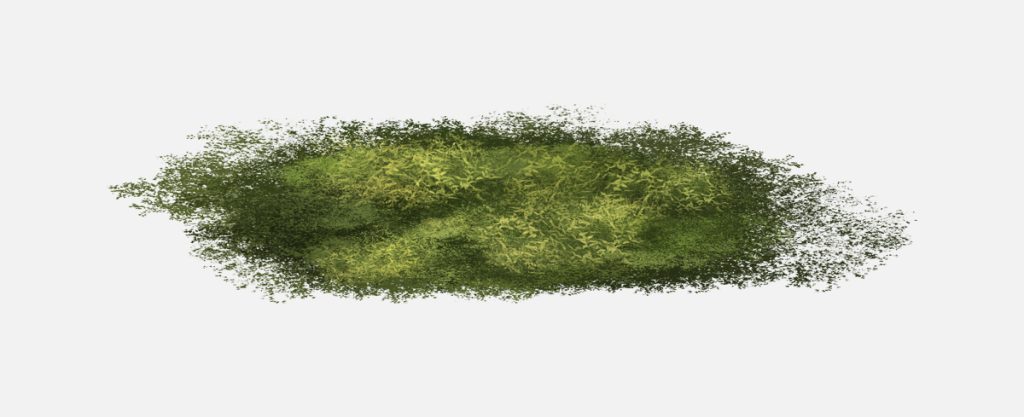
Introduction Grass tutorial Photoshop can add depth and realism to your digital artwork. In this tutorial, we’ll guide you through the steps to paint grass using custom brushes

Tutorial Assets

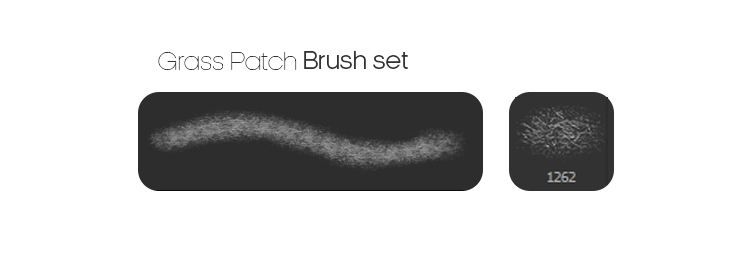
  • Grass Brushes: Download our specialized brush set here for the perfect tools to create lifelike grass textures.


Step 1: Selecting the Color of Grass

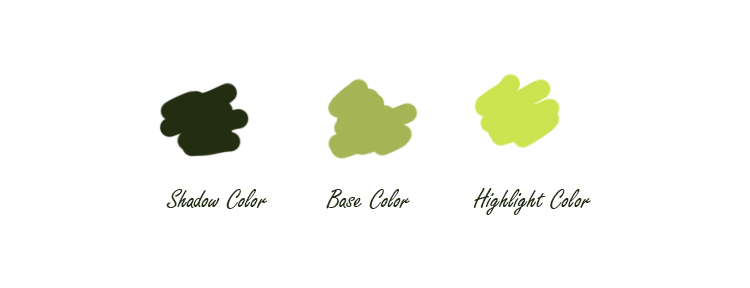
Begin by choosing the appropriate colors for your grass. Here’s the palette used in this tutorial:

  • Shadow Color: #232d11
  • Base Color: #a5b555
  • Highlight Color: #cbe450

Selecting the right colors is essential to achieving a realistic look. Start with a base color that represents the overall tone of your grass. Use lighter shades for highlights and darker shades for shadows to add depth and dimension.

To use the brushes, you need to load them into Photoshop first, you need to create a new layer above the background layer.

Step 2: Selecting the Color of Grass

First, create a new document in Photoshop by pressing Ctrl + N or navigating to File > New. Set the dimensions to 5000 x 3000 pixels at 300 dpi to ensure high-quality output.

Next, choose the appropriate colors for your grass. Here’s the palette used in this tutorial:

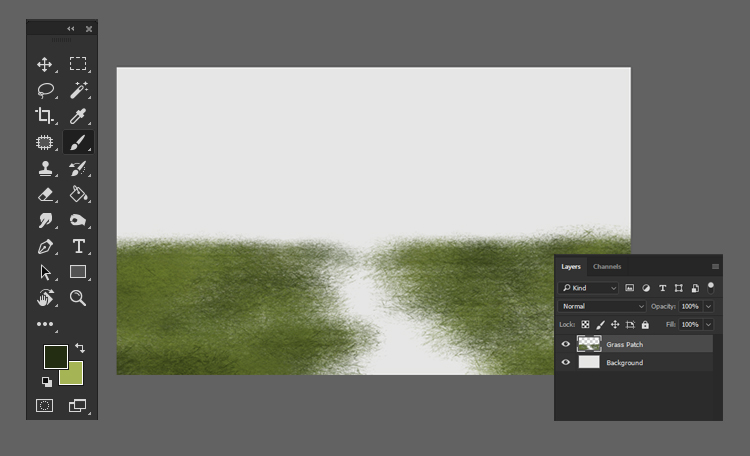
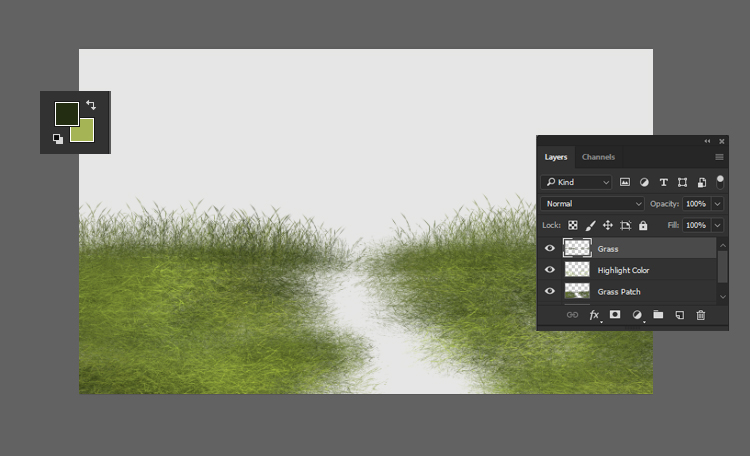
Set the base color as your background color and the Shadow color as your foreground color.

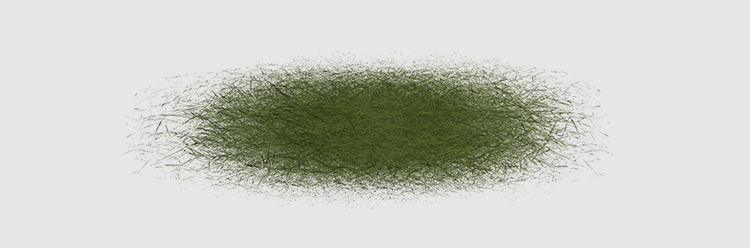
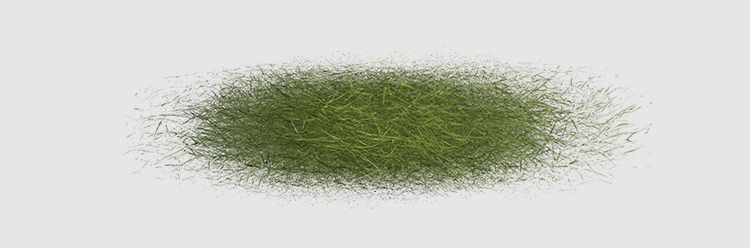
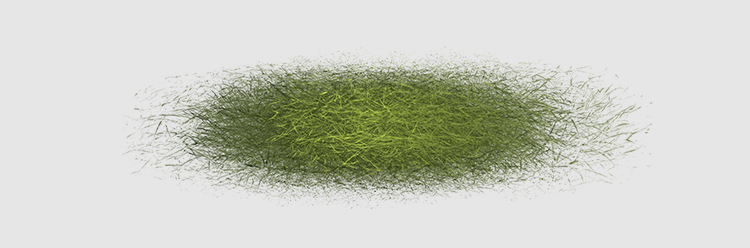
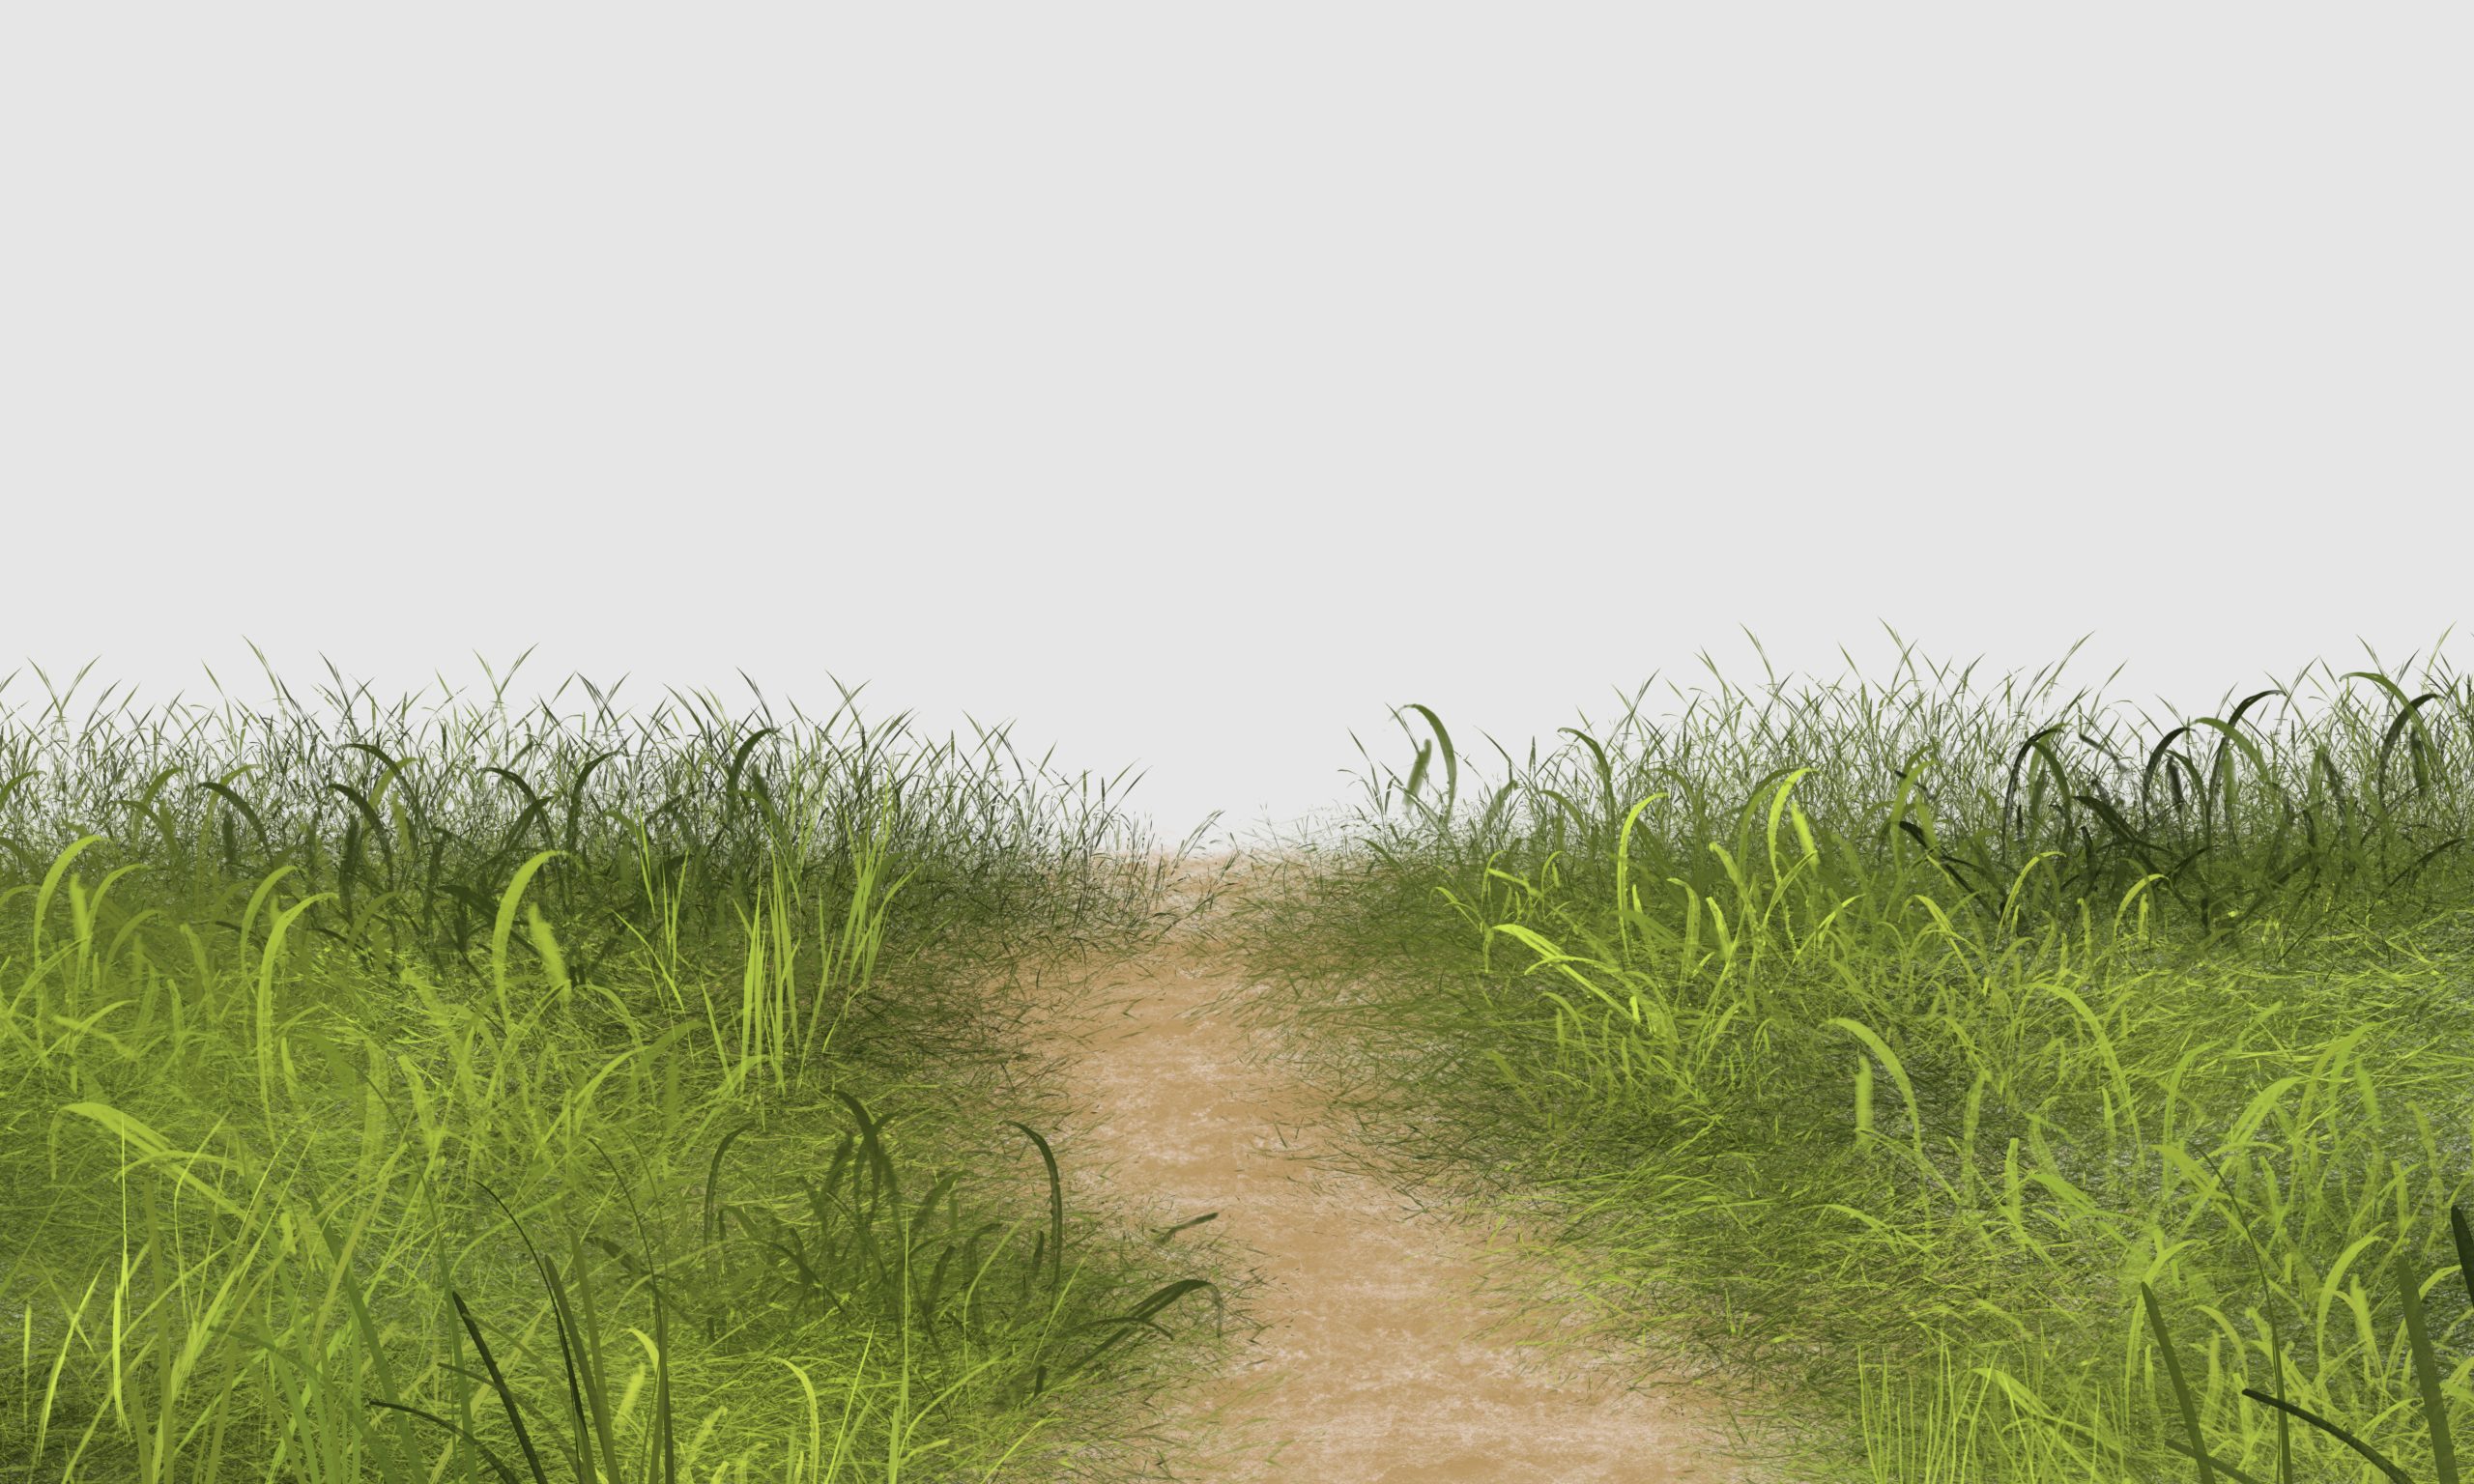
Using the custom grass brushes, paint a patch of grass. Start with the Shadow color, then add the highlight color to create variations.

Grass tutorial Photoshop

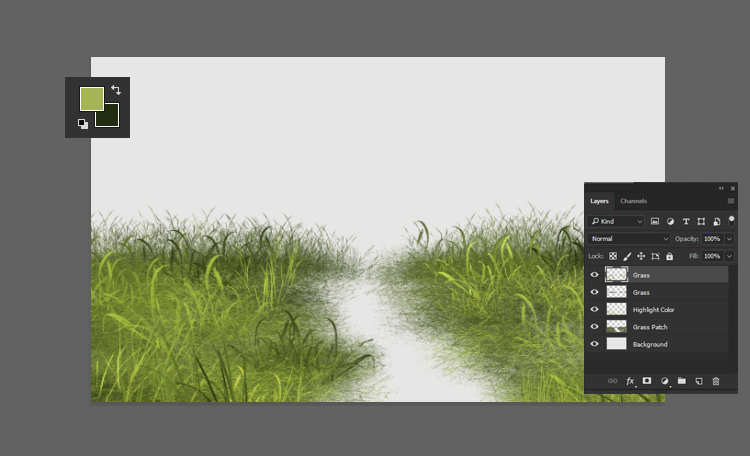
Step 3: Paint Long Grass

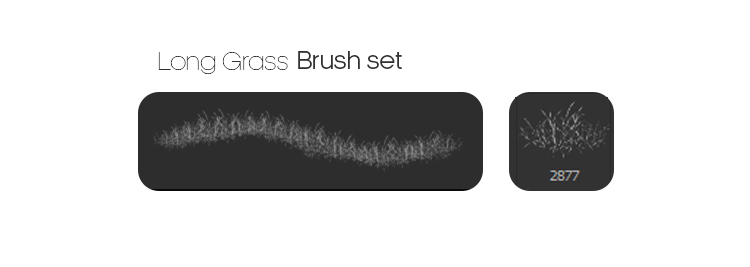
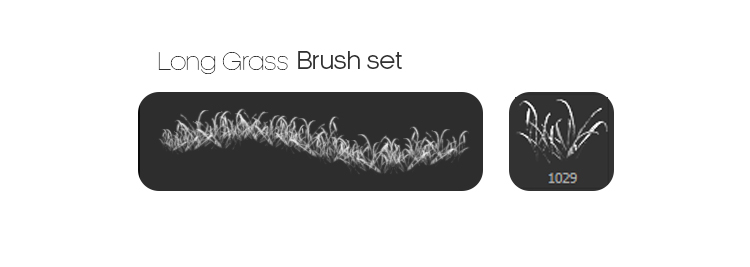
Select a variety of grass brushes from your custom set.

Paint long grass by layering different brush strokes. This will add texture and natural variations to your grass.

Grass tutorial Photoshop

Step 4: Paint Long Grass Highlights

Continue painting the long grass with the highlight color. This will create a more dynamic and realistic look.

Grass tutorial Photoshop

Step 5: Paint Mud

Before starting, you can refer to our detailed article on how to paint mud or download our custom mud brushes here.

Use the following colors to paint mud in the background or foreground:

  • Mud Base Color: #b79764
  • Mud Highlight Color: #cdb89d
Grass tutorial Photoshop

Finishing Touches
Once you have completed painting the grass and mud, take a step back and review your work. Make any necessary adjustments to ensure that the colors blend well and the textures look natural. Experiment with additional brush strokes or layers to enhance the realism of your grass.

How to Paint Realistic Mud in Photoshop

Introduction Paint mud in Photoshop can enhance the authenticity of your digital landscapes and artworks. This tutorial will guide you through the process using our custom mud brushes, ensuring that you achieve stunning results every time. Whether you’re a novice or a seasoned artist, our step-by-step guide will make the process straightforward and enjoyable.

Tutorial Assets

Step 1: Select the color palettes

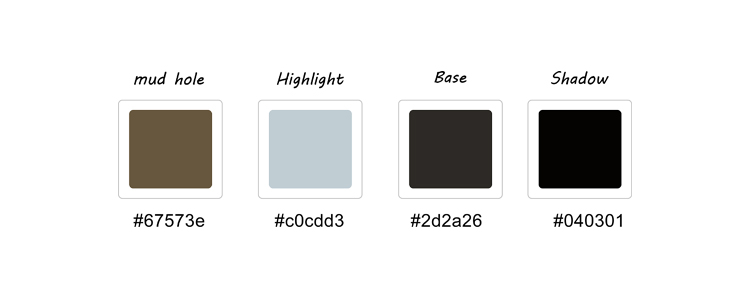
Select the color palettes To paint realistic mud with the brushes, you need to choose the right colors for your scene. You can use one of the five swatches palettes that come with the brushes or create your own custom palette.

Know the names of the colors Each palette has four colors that are named according to their role in the mud painting.

Step 2: Paint the base color

To use the brushes, you need to load them into Photoshop first, you need to create a new layer above the background layer.

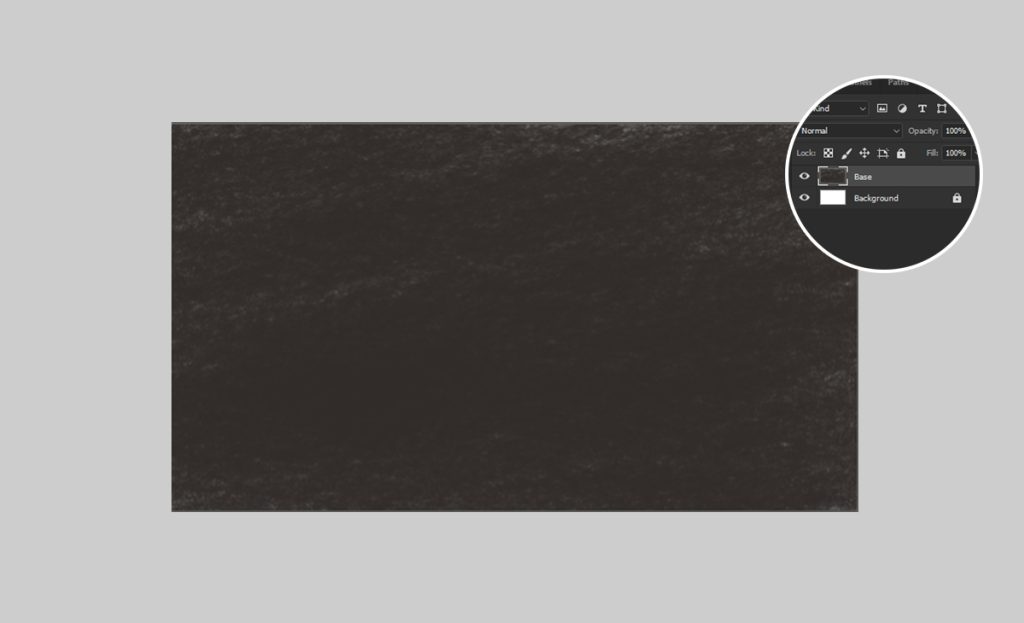
Paint the base color #2d2a26

This is the main color of the mud, usually a dark brown or gray. You will use this color to fill the background layer.

you need to create a new layer and use a brush with the color that you chose as the base. To create a new layer, go to Layer > New > Layer ( Ctrl+Shift+N on your keyboard)

Name the layer “Base” and click OK. Choose one of the mud brushes as you like.

To paint the base color, use the Brush Tool (B) and paint over the entire canvas with the mud brush. You can vary the pressure and direction of your strokes to create some texture and variation on the mud. You should now have a layer of mud color on your canvas.

paint mud Photoshop

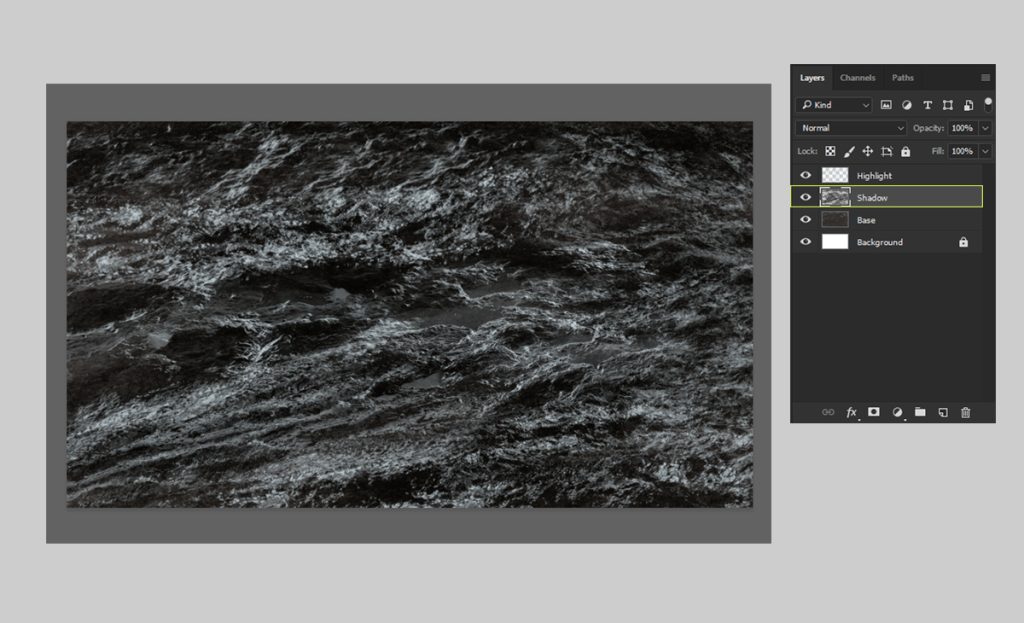
Step 3: Paint the highlight

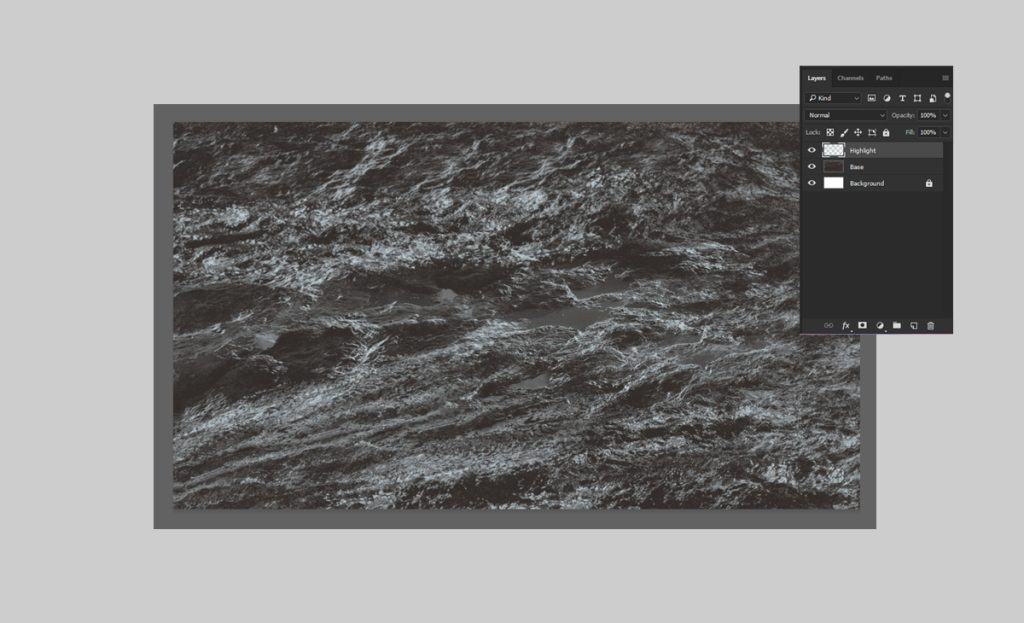
Create a layer to paint the highlight and use different Mud brushes with the color that you chose as the highlight. #c0cdd3

This is a slightly lighter color than the base. You will use this color to paint the highlights and contrast of the mud,
Name the layer “Highlight” You can use different brushes to create different effects and textures for the highlight.

paint mud Photoshop

Step 4: Paint the shadow

Paint “Shadow” #040301

This is the darkest color in the palette. You will use this color to paint the deepest and darkest parts of the mud, such as crevices, holes, or areas that are far from the light source. This step will make contrast and depth in your mud painting.

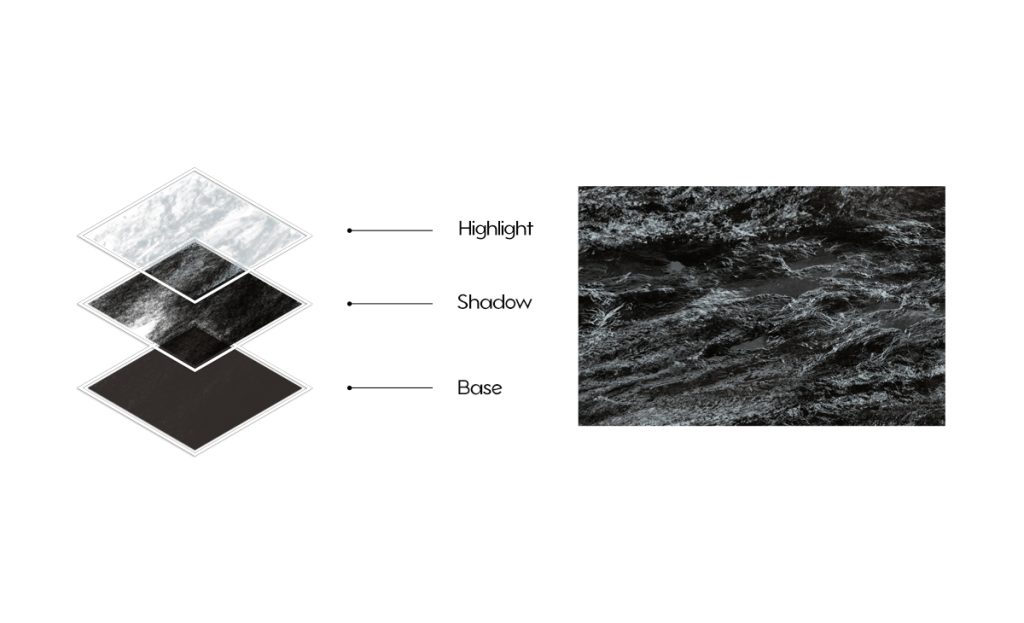
Note: Make sure that the dark colored layer (shadow) is under the light-colored layer (highlight) in the Layers panel.

paint mud Photoshop

Arrange the layers to make your mud painting look realistic

paint mud

I hope this image inspires you to create your own mud paintings with Photoshop.

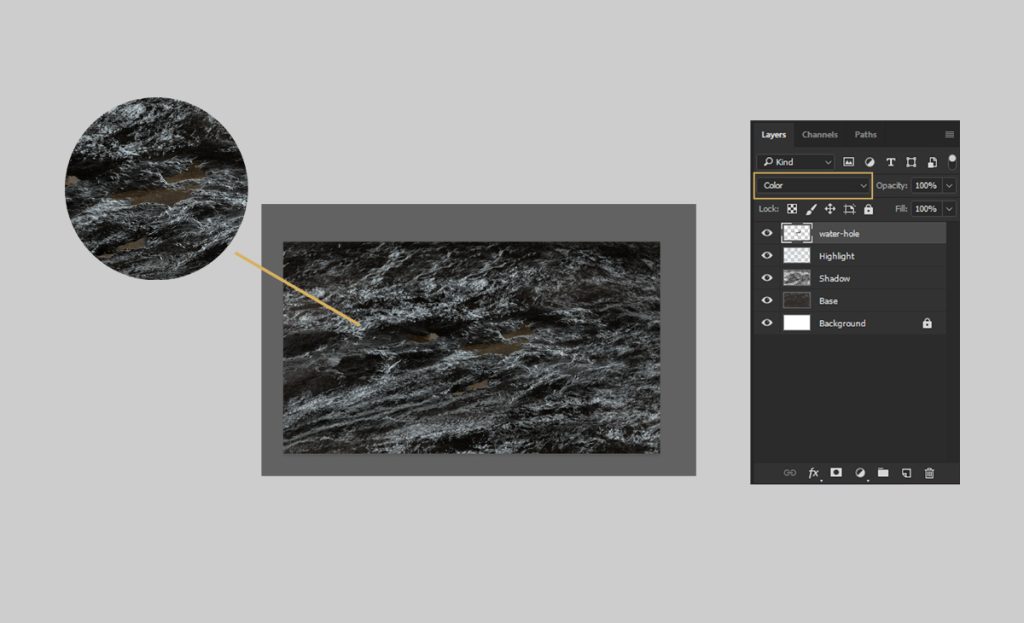
Step 5: Paint the mud hole

To paint the mud hole, you need to create a new layer and use a soft round brush with a Brown color #67573e

change the layer mode to color, go to the Layers panel and click on the drop-down menu.
Choose “Color” from the list

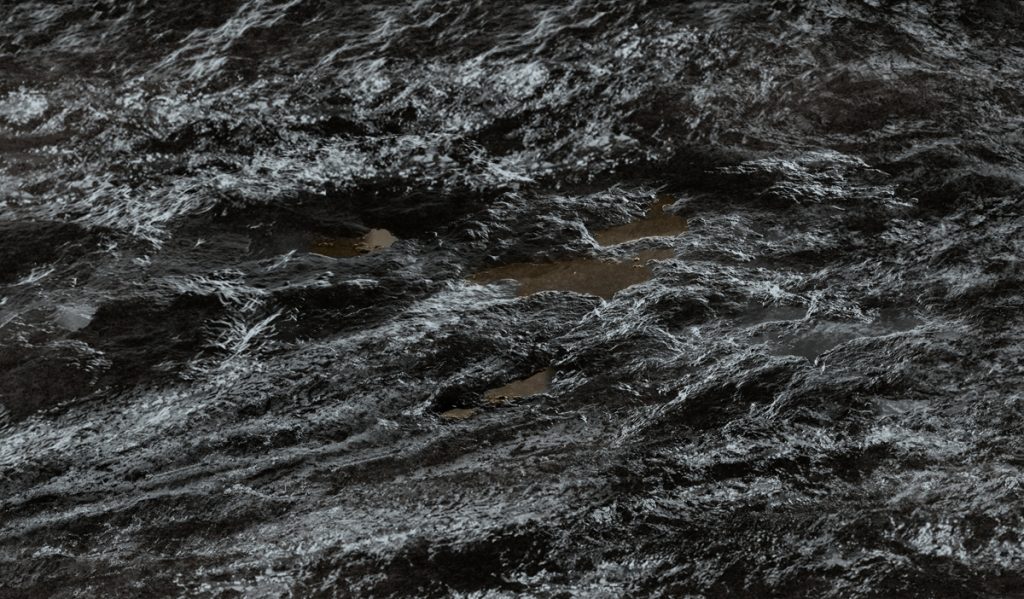
You have completed the tutorial on how to paint mud with Photoshop. You have learned how to use the mud brushes and the color palettes to create realistic and detailed mud effects. You have also learned how to paint a mud hole with a simple trick. You can use these techniques to create infinite scenes and scenarios with mud, such as swamps, deserts, battlefields, or anything else you can imagine.

paint mud

Create a Realistic Nebula in Photoshop

Hey there, space lovers!

Tutorial Resources 

Do you want to learn how to create amazing nebula in Photoshop?

If so, you are in the right place. In this blog tutorial, I will teach you how to use my space brushes to paint beautiful and realistic nebula in photoshop.

My space brushes are specially designed to help you create stunning space scenes with ease. They have different shapes, sizes, and textures to suit your needs and preferences. You can use them to paint Nebula, stars, shooting star, black holes.

In this tutorial, I will give you some tips and tricks on how to blend the colors, add effects, and make your nebula look awesome.

You will see some examples of how I used these brushes in my own artworks as well.

Step 1: Create a new file and fill in a dark background.

The first thing you need to do is to create a new file in Photoshop.

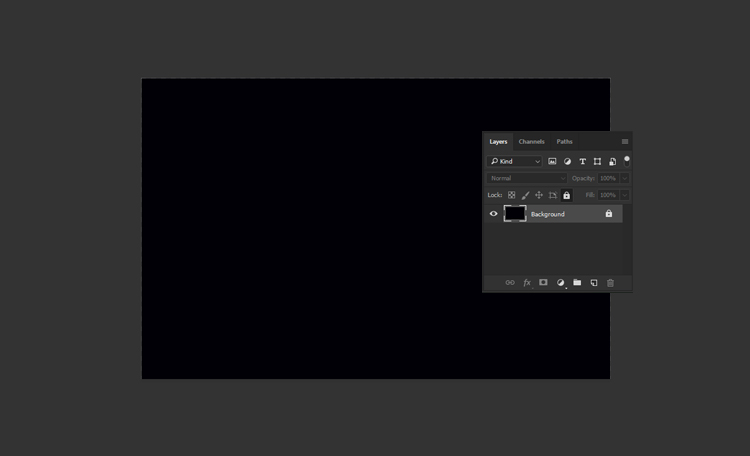
Go to File > New and choose the size and resolution you want. I recommend using a large size and a high resolution for better quality. For this tutorial, I used 2500 x 1605 pixels and 300 dpi. Next, you need to fill in the background with a dark color #010006

.

This will create contrast and make your nebula stand out. You can use any dark color you like, but I suggest using a dark blue.

To fill in the background, go to Edit > Fill and choose the color you want. Alternatively, you can use the Paint Bucket Tool (G) 

and click on the canvas.

Step 2: Paint with any nebula brush

Now comes the fun part. You can start painting your nebula with any of the space brushes.

These brushes are dynamic and realistic, so you don’t need to worry about the details. Just let your imagination run wild and enjoy the process.

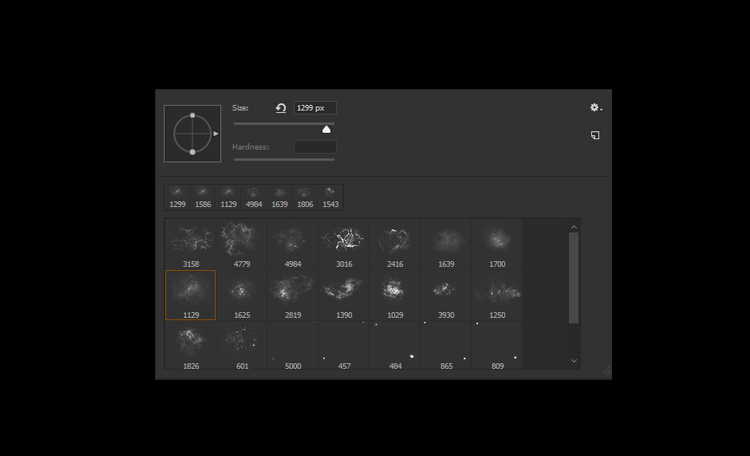
To use the brushes, you need to load them into Photoshop first, you need to create a new layer above the background layer.

Go to Layer > New > Layer and name it “Nebula”. Then, select the Brush Tool (B) and choose any of the nebula brushes from the panel. Next, you need to choose a color for your nebula. You can use any color you want, but I suggest using a light or bright color to contrast with the dark background.

You can use the Color Picker Tool (I) to pick a color from an image or use the Color Panel to choose a color manually. Then, you can start painting on the canvas. You can use different brushes and colors to create different shapes and effects.

Step 3: Paint another nebula with purple

To make your space scene more interesting, you can paint another nebula with a different color. For this tutorial, I chose purple, but you can use any color you like. To paint another nebula, you need to create another layer above the previous one.

Go to Layer > New > Layer and name it “Nebula 2”. Then, select the Brush Tool (B) and choose another space brush from the panel.

You can use a different brush as before. Next, you need to choose a purple color #7a0c65

for your nebula in photoshop.

Step 4: Paint stars

To complete your space scene, you need to add some stars. You can find dynamic stars in this pack that will help you create realistic stars.

To paint stars, you need to create another layer above the previous one. Go to Layer > New > Layer and name it “Stars. Then, select the Brush Tool (B) and choose any of the star brushes from this brush pack.

Step 5: Add some contrast with a linear nebula.

create a new layer and name it “Linear Nebula”. Then, select a nebula brush and a color for your nebula. I chose a purple color #ff00b8

Next, paint on the canvas with the brush. You can use different brushes and colors to create different shapes and effects.

However, instead of using Linear Light as the blending mode. This will make your nebula brighter and more intense.
You can also change the blending mode of the layer to get different results, but you can experiment with other modes as well.
Nebula in photoshop

Step 6: Add some warmth with a yellow nebula.

To make your space scene more colorful, you can add some warmth with a yellow nebula.

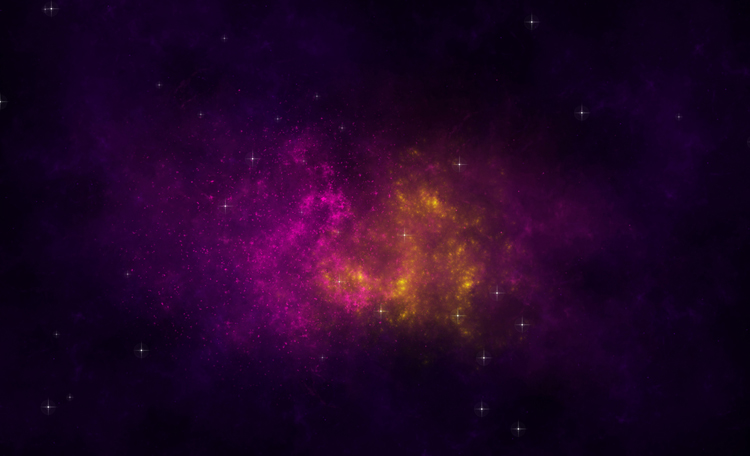
You should have something like this:

Nebula in photoshop

I hope you enjoyed this tutorial and found it useful to create nebula in photoshop. If you did, please share it with your friends. I would love to see your creations and hear your feedback.

Thank you for reading and happy painting!

How to Create a Black Hole in Photoshop

How to Create a Black Hole in Photoshop!

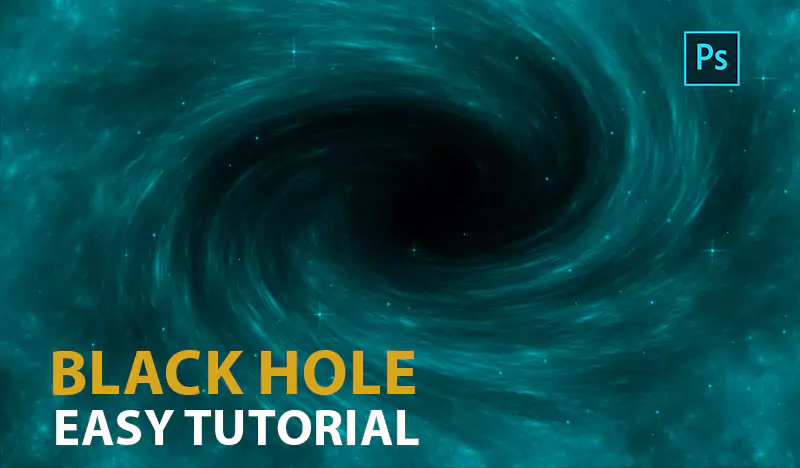
This tutorial will also introduce you to a new technique for Photoshop that I have developed to create realistic black hole in photoshop with brushes. This technique is simple and effective, and it can be used to create different types of black holes with different colors and shapes. You will be amazed by the results you can achieve with this technique and the brush set. So, if you are ready to learn something new and exciting, let’s begin this tutorial!

Tutorial Resources 

Step 1: Create a new file and a dark background color.

The first step is to create a new file in Photoshop with the dimensions of your choice.

I’m using a 2500 x 1605 PX file with a resolution of 300 dpi. You can use any size you want, but make sure it is large enough to fit your space scene.

Next, we need to fill the background with a dark color. You can use any dark color you like, but I recommend using a very dark blue or purple to create some contrast with the stars and planets later. To fill the background, select the Paint Bucket Tool (G) and click on the canvas.

You should have something like this:

Step 2: Import our brushes and select the nebula you want.

The next step is import brushes.

Now, we are going to use one of the brushes to create a nebula. A nebula is a cloud of dust and gas in space.

To create a nebula, select the Brush Tool (B) and choose one of the brushes from the set, which looks like this.

Step 3: Paint with nebula in a circular movement

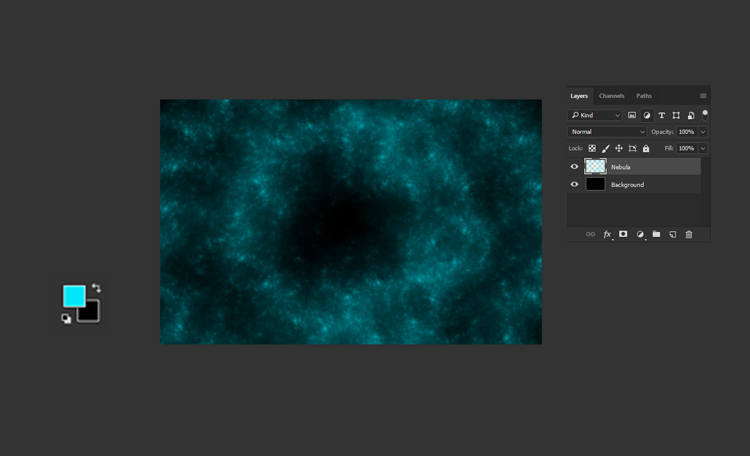
The next step is to change the foreground color to #00e5f8 , which is a bright cyan color. You can use the Color Picker or type the hex code in the box.

Next, create a new layer (Ctrl+Shift+N) and name it Nebula. On this layer,

Paint with the nebula brush in a circular motion around the center of the canvas to create a more dynamic and realistic effect.

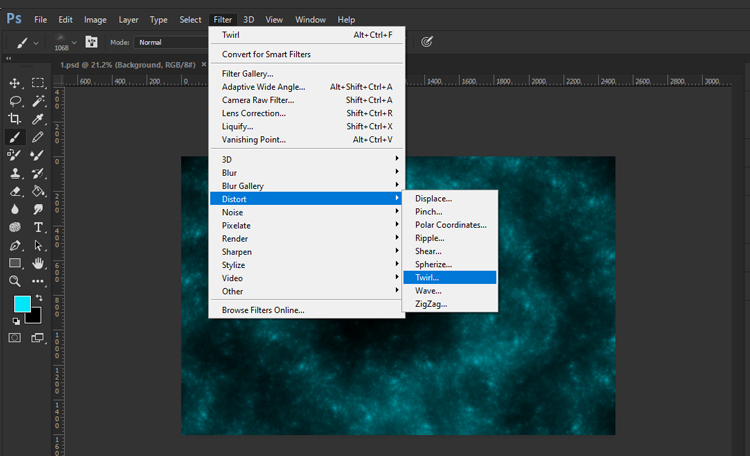
Step 4: Merge layers and apply twirl filter.

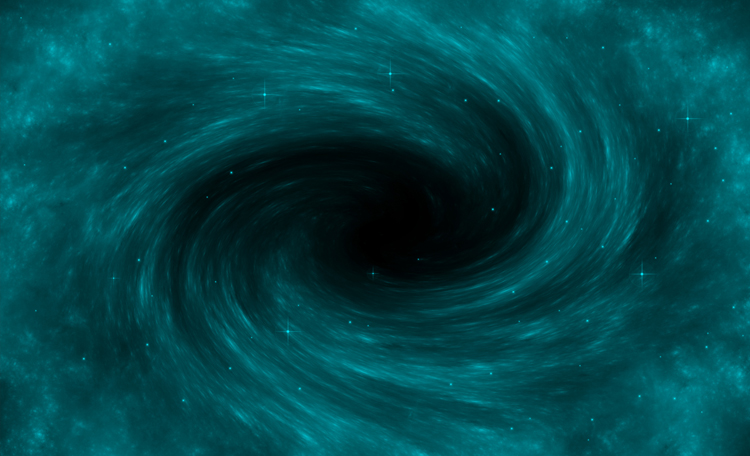
The next step is to merge the nebula layers and apply a twirl filter to create a spiral effect.

To do this, select both nebula layers in the Layers panel and press Ctrl+E to merge them. Then,


go to Filter > Distort > Twirl

and adjust the angle as you like.

black hole in photoshop

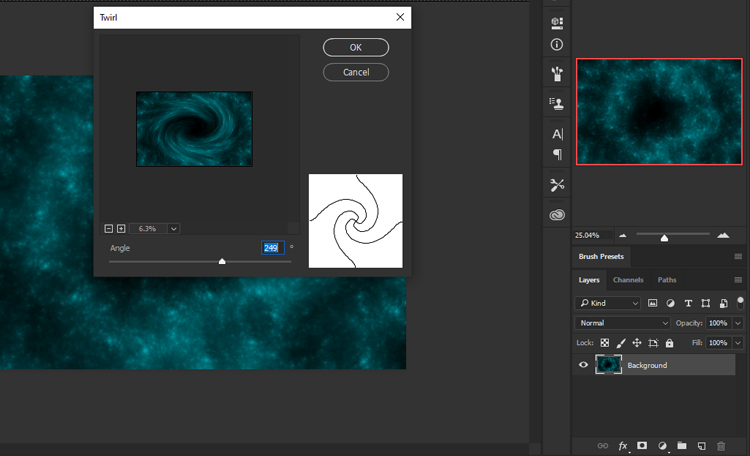
Step 5: Use angle to create a black hole.

The angle is the amount of rotation that the filter applies to the image. The higher the angle, the more twisted the image becomes. The lower the angle, the less twisted the image becomes. You can use any angle you want, but I recommend using a high angle to create a spiral effect.

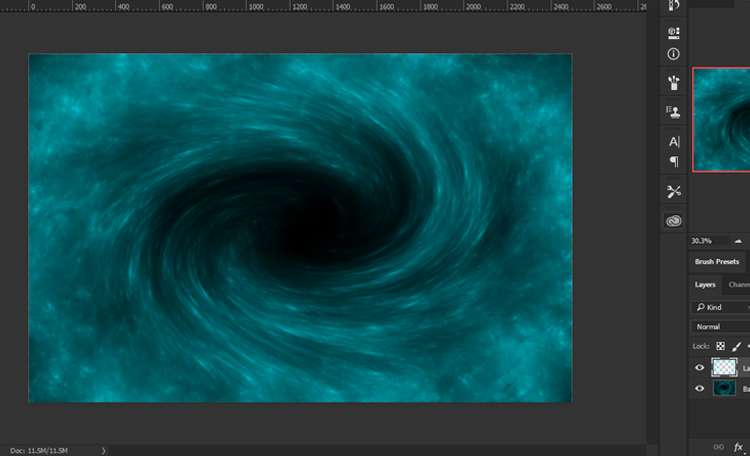
I’m using an angle of 249 degrees. You should have something like this.


Step 6: Create a new layer and paint some edges in the corner.

The next step is to create a new layer and use the same nebula brush to paint some edges in the corner of the canvas. This will add some depth and interest to your space scene. To do this, select the Brush Tool (B) and choose the same nebula brush as before.

Then, create a new layer. On this layer, click and drag the brush along the edges of the canvas. You can use any color you like, but I recommend using a lighter color than the background. You should have something like this:

black hole in photoshop

Next, add some stars to your space scene using the dynamic stars brush in this pack. This brush will create different sizes and brightness of stars depending on the pressure and speed of your stroke.


Congratulations!


You have successfully created a stunning black hole scene in Photoshop using a custom brush set for space. I hope you enjoyed this tutorial and learned something new. Thank you for following along!

How to Create Snow in Photoshop

How to Create Snow in Photoshop

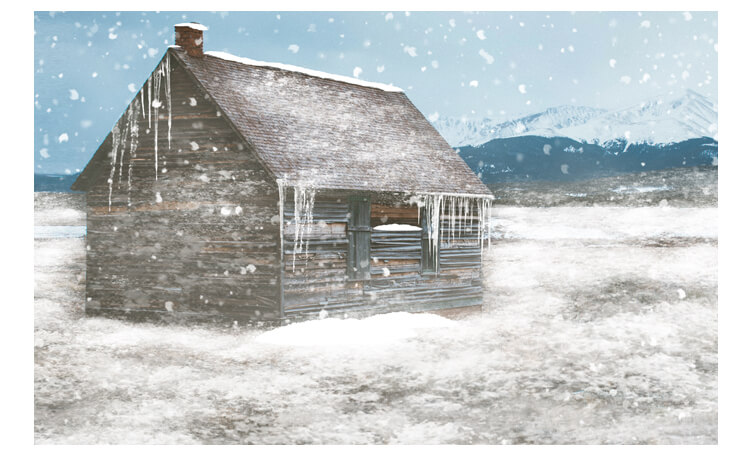
Do you want to create stunning snow scenes in your digital art? If so, you’re going to love this tutorial. I’ve created a brush set for snow in photoshop that you can use to add realistic snow Patch, Falling Snow, icicle, Fog, and snow-covered objects to your paintings. In this post, I’ll show you how to use these brushes to make a beautiful winter landscape in Photoshop. By the end of this tutorial, you’ll be able to create your own snow scenes with ease and confidence. Ready to get started? Let’s go!

Tutorial Resources

Snow Brushes

Step 1: Open your image in Photoshop.

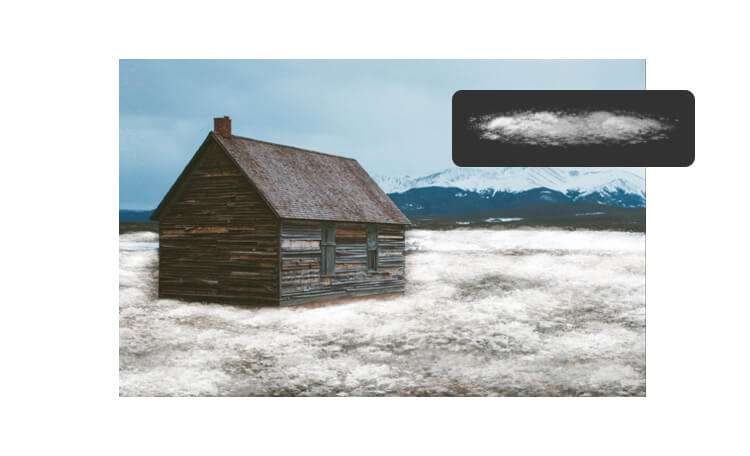
Step 2: Paint the snow on the ground.

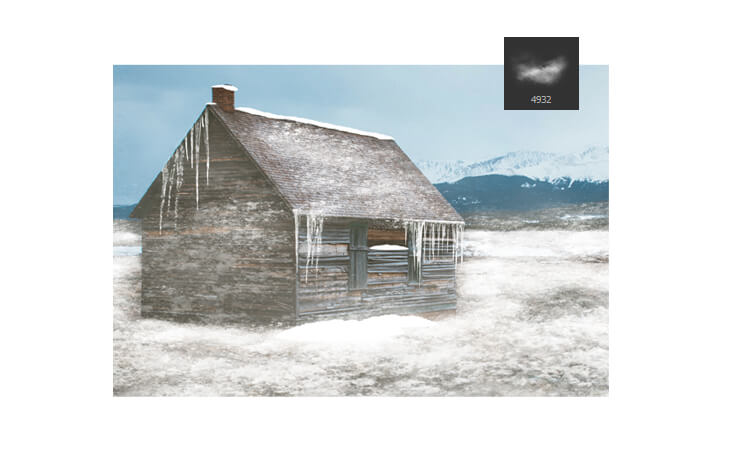
Now that you have your image open, you can start painting the snow on the ground. To do this, you need to select the patch snow brush from my snow brush set. This brush will create a realistic snow texture that covers the original surface. To select the patch snow brush,
go to the Brush Tool (B) and click on the Brush Preset Picker in the Options Bar. Then scroll down until you find the brush and click on it.

snow in photoshop

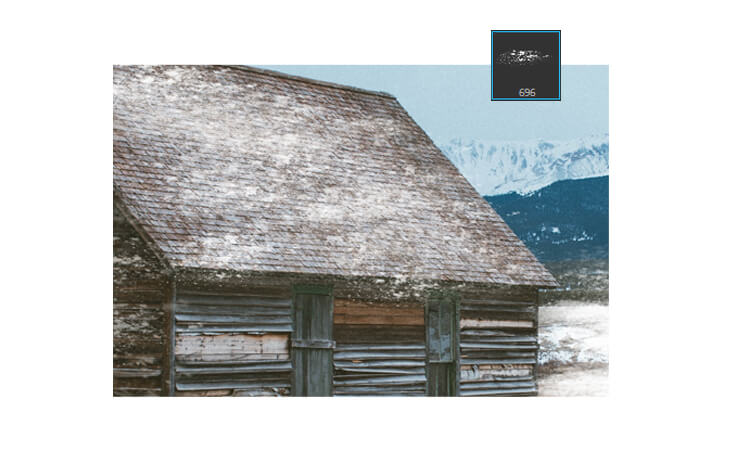
Step 3: Paint the snow on other objects.

After you have painted the snow on the ground, you can use other patch brushes to cover other objects in your image, such as a car or a mountain. This patch brush is lighter and more transparent, so they will create a subtle snow effect that blends with the original color,
select this Patch snow Brush to paint over the areas you want to cover.
Be careful not to overdo it, as too much snow can make your image look unrealistic.

Snow in photoshop

Step 4: Paint the icicles.

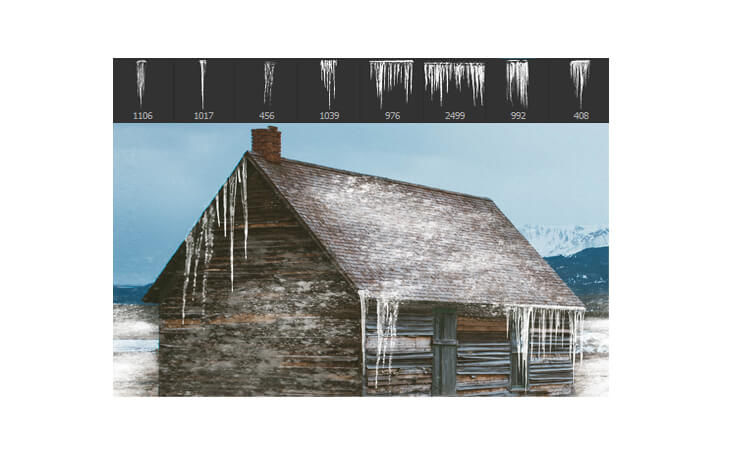
The next thing you can do is to paint some icicles on your image. Icicles are frozen water droplets that hang from the edges of roofs, windows, or other objects. They can add some interest and realism to your snow scene. To paint icicles, you need to use the icicle brush from my snow brush set. These brushes will help you to create different shapes and lengths of icicles.

Snow in photoshop

Step 5: Paint the fog.

Another way to enhance your snow scene is to paint some fog in the background. Fog is a thin layer of mist that reduces the visibility and creates a soft and mysterious atmosphere. To paint fog, you need to use the fog brush from my snow brush set. This brush will create a smooth and cloudy effect that fades the colors and details of the background. You can also adjust the brush size and opacity depending on how much fog you want to create.
Be careful not to cover the foreground or the main focus of your image, as this can make your image look too blurry.


Step 6: Paint the falling snow.

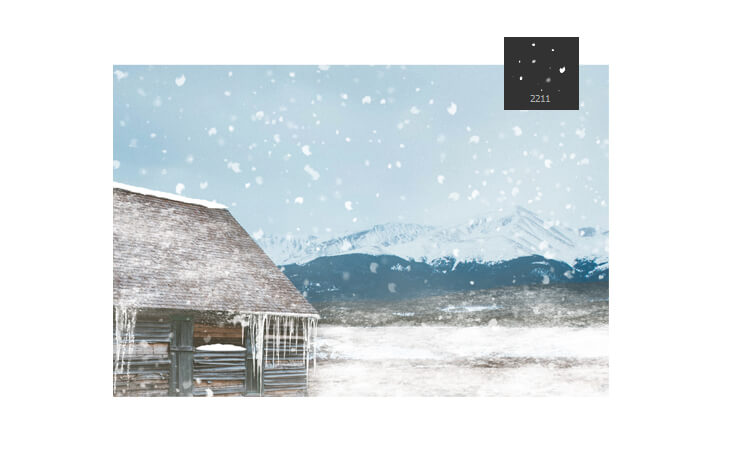
The final touch you can add to your snow scene is to paint some falling snow in photoshop. Falling snow is a collection of snowflakes that drift down from the sky and create a sense of movement and depth. Select falling snow brush from my snow brush set. This brush will create a random pattern of small dots that resemble snowflakes.


Finished!

Congratulations!

You have successfully created a snow scene in Photoshop.
I hope you enjoyed this tutorial and learned some useful tips and tricks.

see other tips &Tricks

How to make Realistic bubbles in Photoshop

Do you want to learn how to create realistic bubbles in Photoshop? Bubbles can add a fun and magical touch to any photo, but they can be tricky to make look natural and convincing. In this tutorial, I will show you how to use my brushes and techniques to create amazing bubble effects in Photoshop. You will also learn how to customize the colors, shapes, and sizes of the bubbles to fit your style. By the end of this tutorial, you will be able to transform any photo into a bubbly masterpiece. Let’s dive in!

Tutorial Resources
Bubbles Brushes
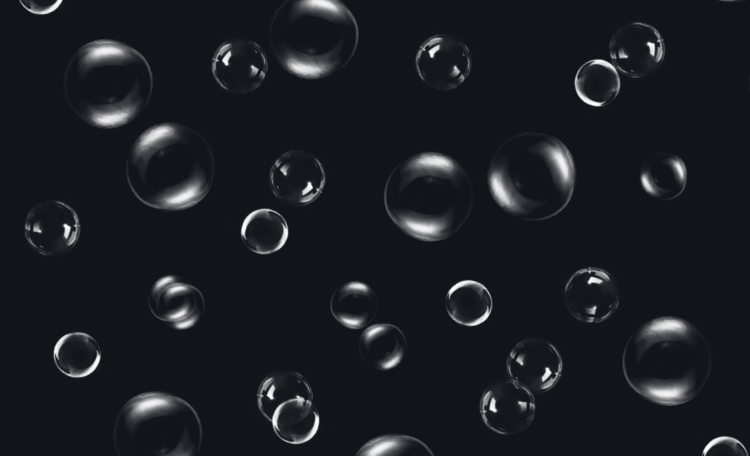
12 high quality Dynamic water Bubbles brushes + 6 Pattern, you can Paint with Bubbles and change your Bubbles colors to get a colorful pack right away!


Before we start, you need to import a pattern that we will use for the bubbles.

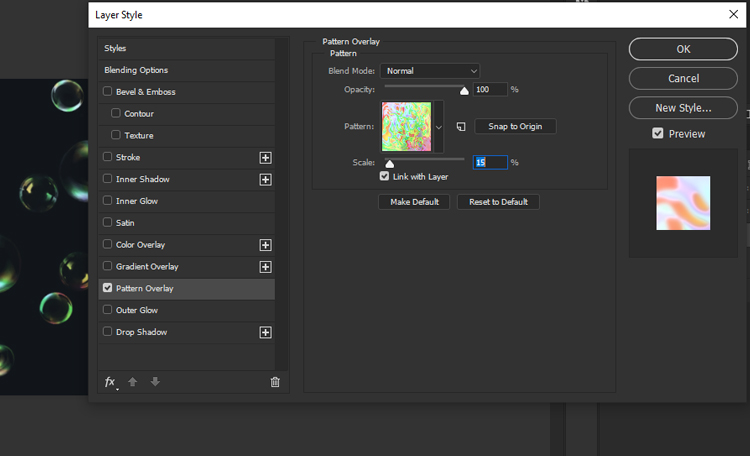
Now we will apply the pattern effect to the bubbles. To do that, you need to select the layer to right-click on the layer with the bubbles and select Blending Options. Then, choose Pattern from the list of blend modes and click OK.


How to Import Patterns in Photoshop

How to import Photoshop Pattern
Do you want to add some flair and texture to your designs in Photoshop? If so, you might want to use patterns. Patterns are repeating images that can fill any shape or area with a seamless effect. You can use patterns to create backgrounds, Brushes, Designs, Logos, and more.

But how do you import photoshop pattern? Maybe you have downloaded some patterns from the internet and want to use them in your projects. Or maybe you have created your own patterns and want to save them for later use.

In this blog post, I will show you how to import patterns in Photoshop in a few simple steps, and how to use them in your designs.


Step 1

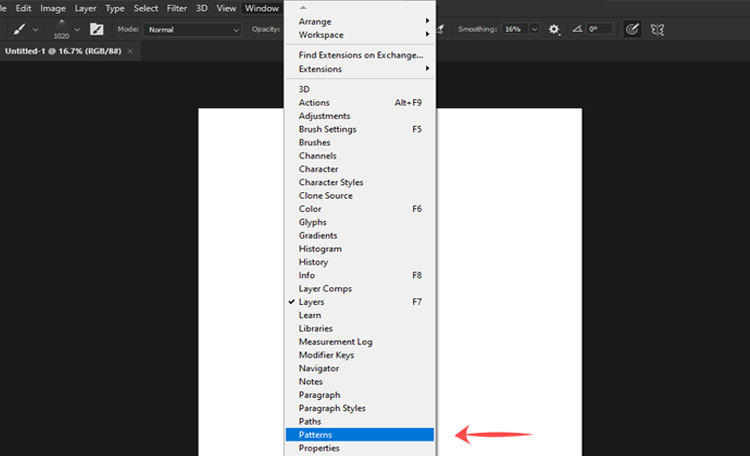
In Photoshop open the Patterns Panel (Window > Patterns)

photoshop pattern

Step 2

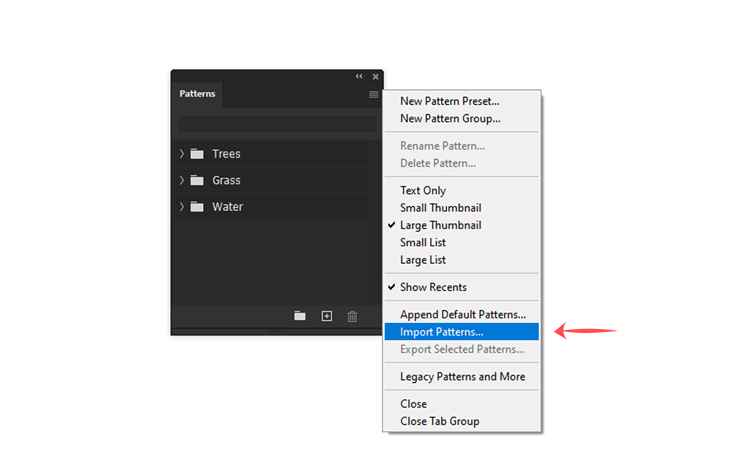
Open the menu and choose Import Patterns

photoshop pattern

Locate your (.pat file) on your hard drive, Click Open to install.

That’s it! You have successfully imported the patterns into Photoshop. You can now see them in the Patterns Panel and use them in your projects.

Photoshop CS6 Instructions.

Step 1

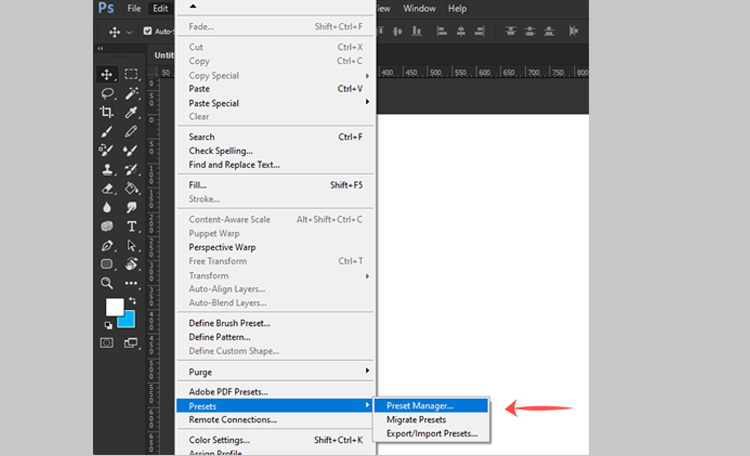
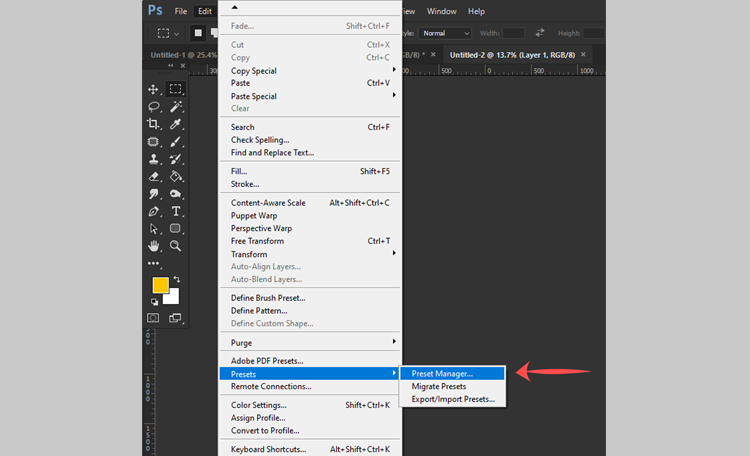
In Photoshop open the Preset Manager (Edit > Presets > Preset Manager)

Step 2

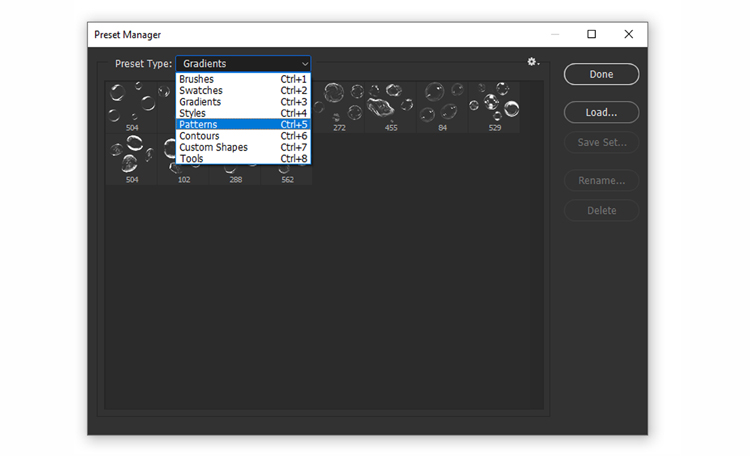
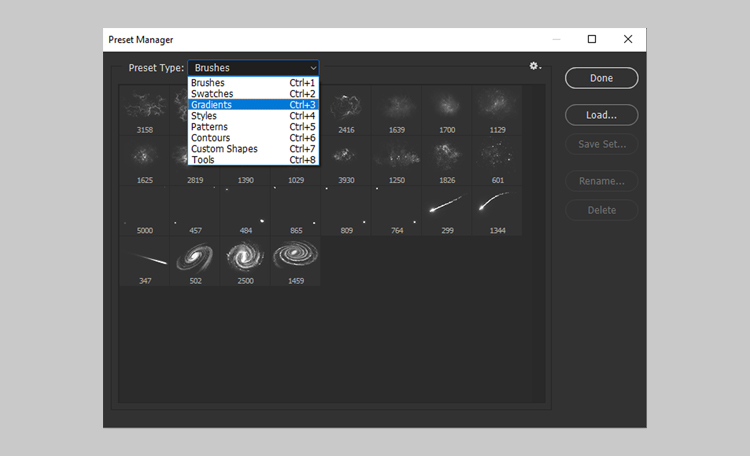
Select “Patterns” from the drop-down menu at the top of the Preset Manager.

photoshop pattern

Step 3

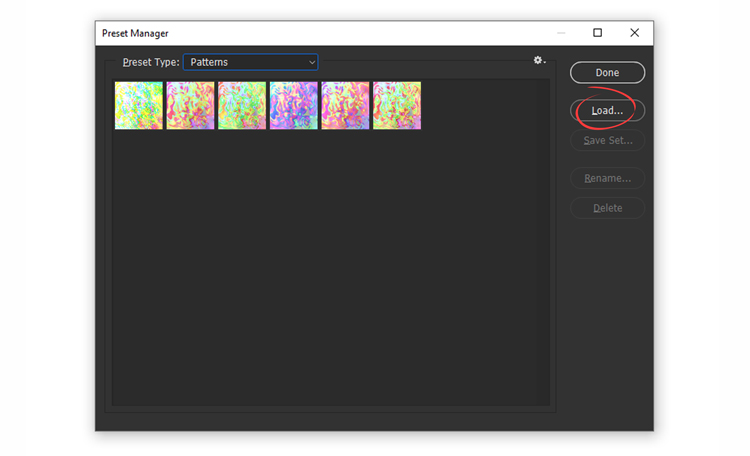
Click the load button then locate your .pat file on your hard drive.

photoshop pattern

I hope you enjoyed this tutorial and found it helpful.


How to Import Gradients into Photoshop

Gradients are a powerful tool in Photoshop that can help you create stunning effects on your images. But did you know that you can also import gradients from other sources and use them in your projects? In this tutorial, I will show you how to install gradients in Photoshop and how to use them to enhance your photos. You will learn how to access the Gradients panel, how to import gradients from a GRD file, and how to apply them as gradient layers or fill colors. Whether you are a beginner or an expert, you will find this tutorial useful and fun. Let’s get started!

Step 1

Go up to the Edit > Preset Manager

Step 2

From the Preset type drop down, select Gradients.

Step 3

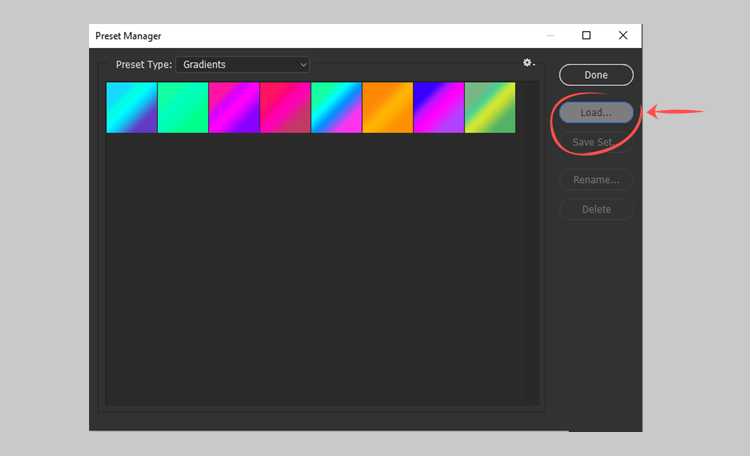
Click on Load and select the gradient file (GRD FILES) Click on open, your new gradients will be added.